Showing posts with label Cooking. Show all posts

Thursday, September 12, 2013

Chopped Veggie Slaw with Feta Cheese

  No comments    
categories: , , ,
Veggie Slaw
I love finding salads that find a way to make tons of veggies delicious together. Especially raw veggies that you’d probably never eat alone (i.e. yellow squash—can’t imagine eating that raw as a snack!)… however chopped thin and mixed together with other veggies it is delicious!
I found this recipe from Proud Italian Cook and she makes it look amazing! Loving her photos of tons of veggies piled high! Check out the original recipe here.
Ingredients for salad (slightly different from the original recipe based on what I had on hand), all diced into matchstick strips:
  • 1 yellow squash
  • 1 zucchini
  • 1 red bell pepper
  • 1/2 bag matchstick carrots
  • 1/2 red onion
  • fresh cilantro
  • 1/2 c. feta cheese
Ingredients for dressing (also slightly altered):
  • 1/2 c. olive oil
  • 1/3. c. apple cider vinegar
  • 1 garlic clove, chopped
  • 3-4 tbsp. agave nectar (or sugar, or any sweetener)
  • salt and pepper to taste  
Dress and chill slightly before serving.
IMG_0360

Wednesday, September 11, 2013

Chilled Asian Noodle Salad

  No comments    
categories: , , , ,
Asian Noodle Salad
Because I love pasta I of course love salads even more than have some starch in them! I found this recipe on Pinterest from Alchemy Baking, but didn’t have all the ingredients so I adapted it slightly. It turned out delicious!! The mixture of the salty soy sauce in the dressing, along with the tangy rice vinegar and limes, and the sweet agave nectar with the chilled veggies and ramen noodles was just a great combo. This salad is great as a side or as a main dish. I was craving BBQ chicken so I made that as a side, even though it didn’t really seem to go together but they actually tasted good together.
Ingredients for Salad:
  • 1 packet ramen noodles cooked, tossed in olive oil, and chilled (just the noodles, trash the powder)
  • 1/4 bunch of cilantro, chopped or torn
  • 2-3 green onions, chopped
  • 1/2 package shredded carrots
  • 1 yellow bell pepper, sliced thin
  • 1/2 head of red cabbage, shredded or sliced
  • 1/3 bag baby spinach, chopped thin
Ingredients for Dressing:
  • 1/3 c. rice vinegar
  • 1/3 c. olive oil
  • 1/8 c. soy sauce
  • garlic salt
  • 1/4 c. agave nectar (to taste)
  • juice of 1 lime
I altered the ingredients to the salad (I think she had bean sprouts and nuts in it and used linguine) and in the dressing I didn’t use any sesame oil or ginger, added lime juice, and swapped agave nectar for brown sugar. Honestly the dressing is so good you can just chop up whatever veggies you have and mix them with this dressing.
Asian Noodle Salad Prep
Once you combine all the salad ingredients, mix with the dressing. I didn’t end up needing all the dressing (would have been too saucy) so add it slowly. Chill before serving!     Asian Noodle Salad       Asian Noodle Salad

Monday, September 9, 2013

Cheesy Shredded Chicken Taquitos with Pineapple Peach Salsa

  4 comments    
categories: , ,
Shredded Chicken Taquitos
We love Mexican in our house and probably have it a couple nights a week. We’re always trying to think of new ways to make our Mexican dishes. Yesterday I put some chicken and Mexican seasonings in the crock-pot before we left for church and afterwards decided to make taquitos for dinner rather than our usual shredded Crock Pot chicken tacos. These were easy, fast, and deliciously crispy. Here’s how I made them:
Ingredients:
  • 2 lbs. chicken breast meat (fresh or frozen)
  • chili powder, garlic salt, cumin to taste (or a can of enchilada sauce)
  • water
  • corn tortillas
  • 1 can refried beans
  • 1 1/2 c. grated cheese (I used colby jack but cheddar, jack, jalapeno, or any other cheese will work)
  • olive oil (or any kind of oil for frying)
  • Pineapple peach salsa (Or mango salsa, or any kind of sweet salsa—I found mine at Walmart and was so surprised to see a cool flavor there I decided to buy it)
  • Shredded lettuce
In Crock-Pot combine 3 cups of water, a generous amount of chili powder and garlic salt, and 1 tablespoon of cumin. Stir to incorporate. Place chicken breasts in Crock Pot and cook for 2-3 hours on high or 4-5 hours on low.
Once chicken is cooked, remove breasts into a large bowl and shred with 2 forks. Chicken should fall apart. Once all the chicken is shredded add 1/2 c. of the stock from the Crock Pot into the shredded chicken and mix to keep it from getting dry. 
Add 1/2 can of refried beans to chicken. Then add grated cheese to the top. Microwave for 1-2 minutes to melt cheese and warm the beans. Then stir well to incorporate the beans, chicken, and cheese. This is your taquito filling. Set aside.
Get out 10-12 corn tortialls. Pour 1/2 inch of oil in the bottom of a skillet and heat for 3 minutes. While oil is heating, fill corn tortillas one by one, placing filling on the side of the corn tortilla and rolling it over itself. Corn tortillas break very easily and if you put the filling in the middle they will break when you roll them. Use less filling than you think you need! Taquitos should be thin.IMG_0141IMG_0142 
Place a toothpick in each rolled taquito and stack on a plate. Using tongs, transfer uncooked taquitos one-by-one into the oil. Cook until golden brown on first side and then rotate to cook the next side. Remove from oil once cooked and place on a plate with a paper towel underneath to soak up the oil. Fry up all the taquitos until done.IMG_0151 IMG_0192
Serve with the pineapple peach salsa or any other sweet salsa you have and shredded lettuce. The sweet salsa really breaks up the creamy taquito filling! Such an easy but yummy dinner.
IMG_0191

Friday, September 6, 2013

Simple Apple Walnut Salad

  No comments    
categories: , , , ,
Apple Walnut Salad
Every fall I get the itch to start cooking (and baking of course) with apple and pumpkin… which doesn’t make much since seeing as it’s still about 90 degrees out. I’m just willing fall to come faster!
This is one of our favorite salads—so simple and we always have the ingredients on hand. Enjoy!
Ingredients (makes 2 large plate salads or 4 side salads):
  • Spinach (1/2 bag)
  • Romaine lettuce, chopped (1/2 head)
  • 1/2 c. feta cheese (gorgonzola works great too)
  • 2 apples thinly sliced
  • 1 c. candied walnuts (tutorial here)
  • Poppy seed dressing, to taste
Mix lettuces first, then add apples, chilled walnuts, and feta. Dress when ready to eat. This salad is great leftover too so only dress what you’re going to eat at that meal! We love this as a main salad or as a side.
IMG_9974IMG_9968IMG_9978

Wednesday, September 4, 2013

Mexican Cheese Sweet Pork Nachos

  No comments    
categories: , ,
SweetPorkNachos
Last week after making a huge crock pot of shredded pork, I had a lot left over I wanted to use up. Pork is an interesting meat because it really takes on the flavors added to it and soaks them up. The pork we used for our Shredded Pork Tacos was slightly sweet but more spicy. After a day in the fridge the pork became really sweet. It just soaked up that brown sugar.
My husband loves nachos so I figured sweet pork paired with some creamy Mexican cheese and fresh tomatoes would be a good combo and an EASY dinner. Also we had a bag of “Hint of Lime” Tostitos chips so it was a no brainer. Those chips are too insanely good to describe. Because the meat was already made, all I needed to do was throw the ingredients onto a baking pan and cook for 15 minutes. I made a small side salad to go with it and we had an easy but yummy dinner. 
Ingredients:
  • Shredded sweet pork (recipe here)
  • Cojita or Mexican farmers queso white cheese (I used the farmers queso—it is so creamy!)
  • Tortilla chips, 1 bag (Hint of Lime chips if you have them)
  • Shredded cheddar cheese (approx. 2 cups)
  • Diced tomatoes (1-2 tomatoes)
Spray baking sheet with cooking spray. Pour chips out and evenly layer on baking sheet. {You can put a layer of cheese in between the chip layers if you’d like, but we like to have some plain chips on the bottom of the nacho stack because the top chips get so loaded.}
Sprinkle a layer of cheese over chips, then pork, then tomatoes, Mexican cheese, and more cheddar on top. Bake at 415 F for 15 minutes. IMG_9805
IMG_9785 
Serve with a side salad and you’ve got a great meal.IMG_9787

Friday, August 30, 2013

Ciabatta Roll Avocado BLT

  No comments    
categories: , , ,
Avocado BLT2
This meal is so easy and tasty, it’s always a favorite with my husband (and I love it because it takes hardly any time or prep). A friend brought us some tomatoes from her garden this week so I thought it’d be a perfect use for some good, ripe tomatoes.
Ingredients:
  • Bacon
  • Ciabatta rolls (or any kind of nice rolls)
  • Tomatoes
  • Avocado
  • Romaine Lettuce
  • Mayo
IMG_9751
Start by cooking the bacon. The best way I’ve tried is in the oven. No splatters, no cooking it in grease. Just take a cooling rack on top of a cookie sheet, spread out the bacon, and bake at 415 degrees F for about 15 minutes.IMG_9752
Next slice your rolls and lay them out on a different cookie sheet. Spray with cooking spray and set aside. Then slice the toppings.
IMG_9757
Baked bacon just tastes better than pan-fried. It isn’t as greasy, it’s crispy, and keeps its shape better.IMG_9761
My husband usually can’t stand mayo, but for whatever reason he likes it on a BLT. Don’t forget the avocado! Best part in my book ;)IMG_9759

Wednesday, August 28, 2013

Cilantro Lime Avocado Shredded Pork Tacos

  2 comments    
categories: , , ,
Cilantro Lime Shredded Pork Tacos We’ve cooked with sweet shredded pork a lot since moving away from Cafe Rio, our favorite stop for fresh mex with shredded meats. We love making replica pork salads from the restaurant (especially with the huge amount of copy cat recipes we’ve found online), but a lot of times we find the pork is too sweet. Along with rice and beans it can make their dishes very heavy.
We had some friends over for dinner this weekend and one is allergic to poultry so cooking with any turkey or chicken was out. I don’t even cook chicken that much but when I can’t use it I feel nervous to find a meal they’ll like without any poultry or chicken stock. I decided on pork tacos because we love tacos in any variety and I was on a mission to make a spicy shredded pork with only a hint of sweet.IMG_9552 The other thing that makes these tacos is the lime juice shredded cabbage. Cabbage is always a little thick for me so I soaked it in lime juice. The lime is the perfect fresh burst of flavor against the thick sweet and spicy pork. And the creamy cilantro lime sauce just brings it all together. I love tacos!!
Shredded Pork
  • 3 lb. (any size smaller or larger will work too) pork shoulder roast
  • garlic salt
  • cumin
  • chili powder
  • brown sugar
  • 1 can red enchilada sauce
Place pork shoulder in crock pot and trim off any excess fat. Pour water over the pork so it rises 2 inches in the bottom of the crock pot. Cover pork in chili powder (just sprinkle a lot in there, can’t have too much because most of it runs down into the water), garlic salt, and cumin. Cook on low for 8 hours (or high for 4-6). Once crock pot is done, pork should fall apart and shred easily.
Once cooked, remove pork from crock pot, dump out water and rinse/clean it out. Place pork back in and shred it up. Add red enchilada sauce and approximately 1 cup of brown sugar. Mix well. Then cover the pork with more chili powder, and a bit of garlic salt to taste. Make it as spicy as you like it. We like it spicy with a kick of sweet in the back!
Once you get it seasoned to your taste, place crock pot on “Warm” or “Low” setting and pork will be ready and warm when you are ready to eat.
Creamy Cilantro Lime Sauce

  • 1 bottle ranch dressing
  • 3 cloves garlic
  • juice of 1 lime
  • 1/2 – 1 bunch cilantro leaves
  • Place all ingredients in blender or food processer and blend until creamy. I like to make this the day before and chill it, so it’s one less step that day. Also it tastes great chilled.
    IMG_9661
    Additional Ingredients
    • Corn tortillas
    • Red cabbage
    • Romaine Lettuce
    • Farmhouse Crumbled Queso or Cojita cheese
    • Limes (5-6)
    • Cilantro
    • Avocadoes
    Next up, take 1/2 head of red cabbage and dice it into thin shreds. Then dice half a head of romaine into thin shreds and mix with cabbage in a large bowl. Then squeeze the juice of 3-4 limes over shredded mixture and mix to coat with lime juice. Set aside.
    Then grab your small corn tortillas and some cooking spray and a small skillet. On a medium-high heat, cook up the desired number of tortilllas you’ll need for the meal. They taste so much better when cooked up!
    Assemble your tacos with avocados first, then pork, then lime cabbage, then cilantro lime cream sauce, then cheese, and top with cilantro and more lime juice as garnish. These really are such an easy and yummy Sunday dinner because the crock pot does most of the work. IMG_9661   IMG_9660

    Monday, August 26, 2013

    Chili Garlic Butter Pan-Seared Steak

      No comments    
    categories: , ,
    Chili Garlic Pan Seared Steak I’ve been married for 8 years and just cooked restaurant style steaks for us for the 1st time last week. Can you believe it? I’ve made sliced steaks for fajitas and for beef with broccoli, but never have I had to make one that is done well on the outside, juicy in the center, not tough, melts in your mouth, and is essentially the entire focus of the meal. I was a little nervous but I found a great Alton Brown recipe that helped me master the steak cooking. I then added some of the homemade chili garlic butter I made for the asparagus (below) to it, for a restaurant feel (it was our anniversary). I love a good flavor infused butter on a steak.
    Here is Alton’s recipe I used:
    - 1 rib eye steak or 2 New York strip steaks, 1 1/2-inch thick (I used strip steaks and got the smallest ones I could find – with so much else in the meal I didn’t want to be too full from steak)
    - vegetable oil, to coat (I used olive oil)
    - kosher salt & fresh ground pepper
    Directions:
    1 Remove steak(s) from fridge and start bringing them to room temperature.
    2 After 30 to 45 minutes, place a 10 to 12-inch cast iron skillet in oven and heat oven to 500 degrees F.
    3 When oven reaches temperature, remove the pan and place it on a burner over high heat.
    4 Coat steak(s) lightly with oil and season both sides with a generous pinch of salt. Grind on black pepper to taste.
    5 Immediately place steak(s) in the middle of the hot, dry pan. Cook 30 to 60 seconds without moving. Turn the steak(s) with tongs and cook another 30 to 60 seconds, then put the pan straight into the oven for 3 to 5 minutes. Flip steak(s) and cook for another 3 to 5 minutes. (The time in the oven depends on how rare you like your steaks. The time given is for medium, but depends on number of steaks, etc. as well.)
    6 Remove the steak(s) from the pan, cover loosely with foil, and rest for 2 minutes.
    7 Serve whole or slice thin and fan onto plate.
    I oiled and seasoned one side of the steaks while still in their package, then used tongs to turn them onto a plate and season the other side.IMG_9274IMG_9275IMG_9276  
    I slightly altered how I cooked them. Alton said to only sear the front and back side, but I looked at an Ina Garten recipe and it said to sear all sides, even the thin sides, to lock in the juices. Ina never fails me so I did it that way!
    {If you make these be sure to remember the pan is searing hot from preheating in a 500 degree oven. I forgot the handle was hot and burned myself! Just another mom brain moment.}
    IMG_9295  
    Sear all sides then put back in the oven for 4 minutes on front side and 4 minutes on back side for medium (3 minutes for rare and 5 minutes a side for medium well). Top with some of the chili garlic butter, and serve hot. I think I need to start making steak more. This was delicious. steak

    Wednesday, August 21, 2013

    Parsley & Cream Smashed Potatoes

      No comments    
    categories: , ,
    Parsley and Cream Potatoes One thing I love about eating at nice restaurants is their mashed potatoes. Nearly all nicer seafood and steak restaurants I’ve eaten at don’t mash their potatoes 100%, which allows you to taste the actual potatoes (and not just the cream ;). I think whipped creamy potatoes can be nice with turkey dinners or for other occasions, but smashed potatoes taste richer to me.
    Most mashed potato recipes I’ve used or made include lots of garlic—don’t get me wrong I love garlic, but I can’t stand the terrible breath and taste in my mouth all day after eating them. These smashed potatoes are made with parsley and cream so they are rich and delicious but without the after taste.
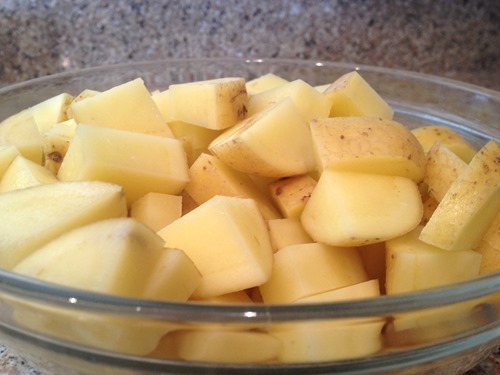
    Here’s what you’ll need: potatoes (I love Yukon Gold but any kind is fine!), cream, parsley, salt, pepper, and some form of butter (I like to use Smart Balance). IMG_9229First get a pot of water heating up on the stove, so it can warm while you cut the potatoes. Then clean the potatoes and chop them into approximately similar sized chunks. If you’re in a rush to make them you could always chop them super small so they cook more quickly. IMG_9233IMG_9236
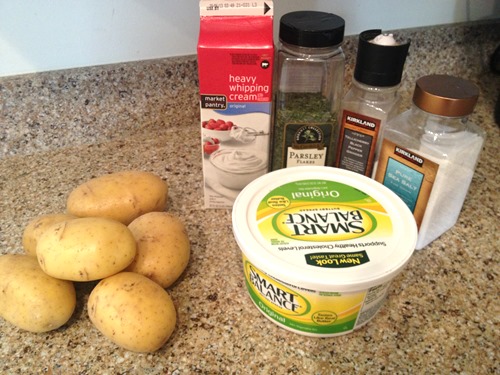
    I like to put the diced chunks into the bowl I will serve them in. This helps me to see how much I need and also keeps me from using another dish.
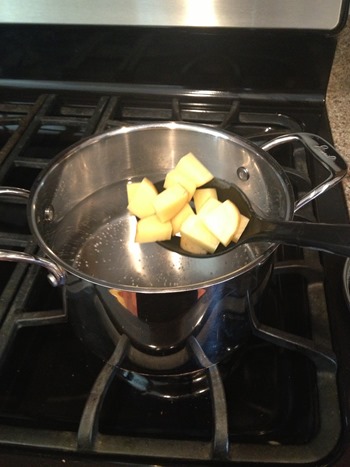
    Once the water is simmering, lower the chunks in with a slotted spoon (this keeps the water from splashing or burning you).IMG_9237
    Once the potatoes are fork soft (about 8 minutes), strain them and place back in their bowl. Add 1 tbsp of butter for every 2 potatoes you used. Then eyeball the cream… if you like thinner potatoes add more, thicker add less, but enough to coat them while mashing.IMG_9281
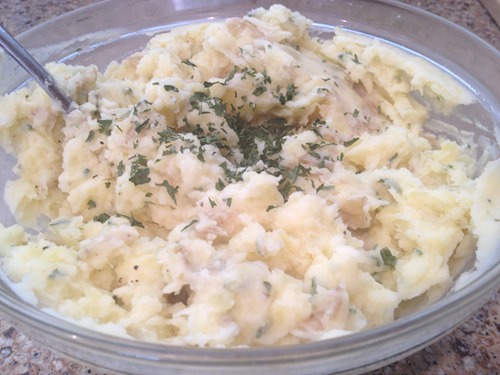
    Here’s how I keep them from being over-mashed—smash them with a fork. When I’m making potatoes for Thanksgiving and everyone wants them super whipped and creamy to eat with the gravy I’ll use an electric mixer, but for this I use a fork.
    Smash away! Leave as many chunks as you’d like. Don’t worry they’ll still be soft. And it’s a great way to relieve aggression! IMG_9282
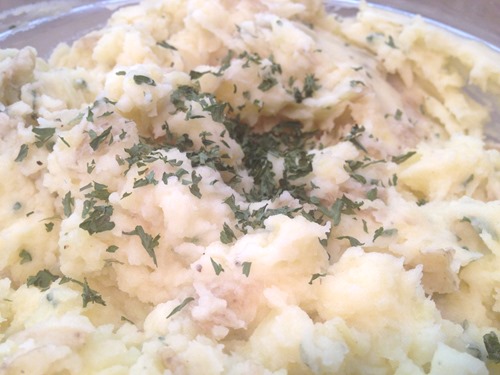
    Next add salt and pepper to taste and mix together. Then add the parsley. I love the clean and fresh taste of parsley, and I also love that it isn’t overpowering. I add a generous amount to the potatoes, mix them in, and then add more as a garnish on top.IMG_9283
    One of the best things about these potatoes is they are fresh, but you always have dried parsley on hand. Fresh parsley is even better if you have it! I don’t have a garden but when I buy it fresh I always try to make these potatoes because it’s so yummy fresh.IMG_9289
    IMG_9290
    Here’s a little trick I use every time I make mashed potatoes. Make them first and then stick them in the microwave (turned off) just to store them and keep them warm while you’re making your other food. It’s tough to have everything ready and warm at the same time while keeping your kitchen clean, so this helps me keep them out of the way. Then when it’s time to eat I just turn on the microwave for a minute and get them nice and hot before serving. The microwaving doesn’t affect the consistency which is nice.IMG_9293IMG_9297

    Tuesday, August 20, 2013

    Seared Asparagus with Homemade Chili Garlic Butter

      No comments    
    categories: , , ,
    Chili Garlic Asparagus
    I love making flavored butter for dishes, especially veggies. Asparagus doesn’t seem to need too much additional flavor but the chili was a nice kick.
    Here’s what you need: Chili powder, cayenne pepper, garlic salt, and any kind of butter (3-4 Tbsp). I used Smart Balance. I love it because it’s dairy free and also because it is easy to work with and spreads nicely out of the fridge. (Also you need asparagus ;)IMG_9240
    Instead of cutting off the ends, I like to snap them where they naturally break. After washing just quickly grab some of each bunch and snap away.IMG_9247  Once cleaned and snapped, set aside.
    For the butter, I like to scoop with with my tablespoon to know how much I’m using.IMG_9252 
    Place the butter in a small bowl or dish. (Kind of looks like ice cream ;)IMG_9257
    Then add 1 tsp of chili powder, 1/2 tsp of garlic salt and 1/4 tsp – 1/2 tsp of cayenne powder (depending on how hot you’d like it).IMG_9262
    Next mash the butter with a fork and then whip until creamy. IMG_9264  
      Then turn it out onto saran wrap and roll into a log. Place in the freezer until you’re ready to cook the asparagus (I usually make it last thing before a meal is ready to serve so it’s fresh!).IMG_9270
    Once it’s chilled, slice it in pats.IMG_9301
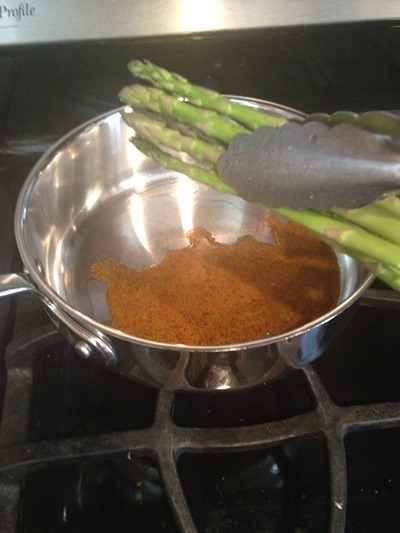
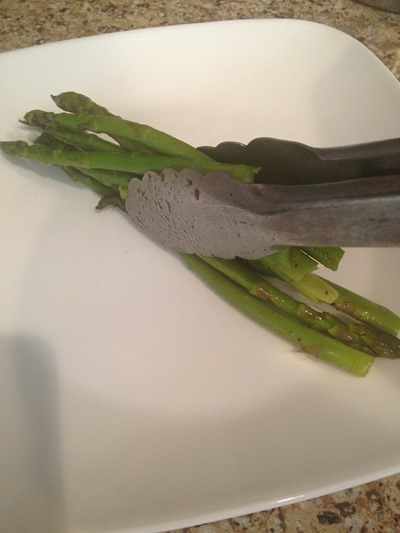
    Place several pats in a pan over high heat. Once melted and when the pan is hot, place asparagus into pan. Cover and sear for 5-7 minutes until asparagus is bright green.   IMG_9294IMG_9299
    Plate and serve with more butter on top.
    IMG_9303
    Perfect with some chili-garlic steak and parsley cream mashed potatoes. Tutorials on those coming later this week.Asparagus