Wednesday, February 16, 2011

Whip Up Something New: February

  No comments    

This month I decided to make calzones for the Whip Up Something New challenge. Every weekend, either Friday or Saturday night, depending on our schedule, I make homemade pizza but I was getting a bit sick of it so I thought this would be a simple twist.

IMGP2747

I usually switch off between KitchenAid’s pizza dough recipe and Ina Garten’s recipe, depending on how much I want to make and/or freeze for later. This past week I did the KitchenAid recipe. Here it is:

  • 1 (1/4 ounce) package active dry yeast
  • 1 cup warm water
  • 1/2 teaspoon salt
  • 2 teaspoons olive oil
  • 2 1/2-3 1/2 cups all-purpose flour
  • I also add about a tablespoon of agave nectar because I’ve heard that sugars activate yeast better. I do this in my breads also and it works really well. Plus, who doesn’t love sugar in their bread?
  • After making the dough and letting it rise, I rolled it out. Though my husband is definitely stronger than me, I’ve become a master dough and fondant roller over the past couple years. We like our crust very thin.IMGP2734

    Add toppings:IMGP2741

    Fold and roll:IMGP2746

    Bake at 450 on a pizza stone for 15 minutes (give or take).IMGP2748

    These ended up being huge so we cut them in half and re-baked the leftovers the next day. They were so delicious. Much better than pizza, in my opinion.IMGP2751

    I called my sister to tell her that calzones were so much tastier than pizza and I couldn’t figure out why; she said “Easy! It’s because the dough-filling ratio is much higher with a calzone.” Of course.

    Thursday, February 10, 2011

    Seat Cushion Cover

      2 comments    

    IMGP2561IMGP2563IMGP2559

    Wednesday, February 9, 2011

    Gallery Wall

      No comments    
    categories: ,

    Last fall we did a gallery wall on our stairway. We taped out the measured area on our carpet first, with painting tape, organized the frames how we liked them, then hung them. IMGP1649

    IMGP2549IMGP2551

    Best part of the project? Buying half the frames at a thrift store and spray painting them… Saves money and looks more unique.

    Friday, February 4, 2011

    Mousse

      No comments    
    categories: ,

    I try to stay away as much as I can from packaged dessert mixes, but I tried this sample at Costco and could not resist the mousse in a box! Why? Well homemade mousse is great but very fattening and takes a while to make. This was delicious.

    IMGP2494IMGP2495

    Wednesday, January 26, 2011

    Easy Window Box Covering / Pelmet Box

      1 comment    
    categories: , ,
    I love online tutorials because they allow me to do a project in a way that I like, while still having some guidance. Here’s my latest project for our downstairs bathroom.IMGP2526
    This is the perfect way to dress up a window without any drapes. I also like that it looks a lot more clean and simple than drapes. (And who wants drapes in their bathroom??)IMGP2533
    None of the online tutorials provided a great way to mount it, so my handy-man husband attached it to the valence cap of our white blinds——now there are no holes in the walls. We really like it, and for a 20 minute project with foam core you can’t go wrong.

    Thursday, January 20, 2011

    Tutorial: Recovering a Lamp Shade

      1 comment    
    categories: , ,

    This is one of those projects that is really useful to spruce up a space. I purchased a lamp I loved… only problem was the stark white shade. I wanted the shade to go next to our office furniture, which is an off-white color. After assembling the lamp I realized the shade is custom fit to the base, so no other shade could fit. I had planned on buying a new shade, but that option was out.

    So I found a couple tutorials online, merged some ideas together, and altered some of their suggestions to finish this project.

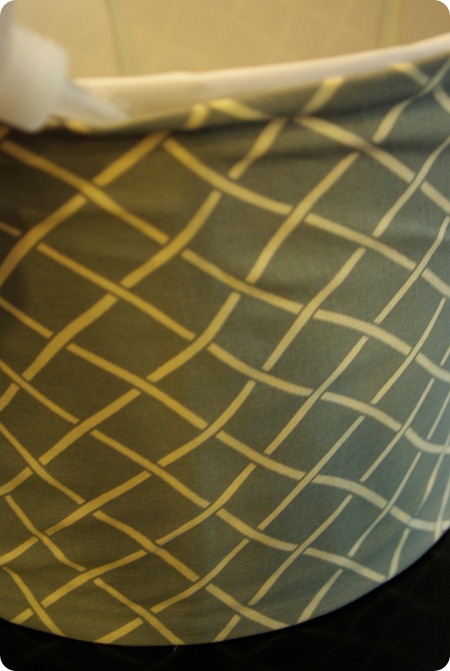
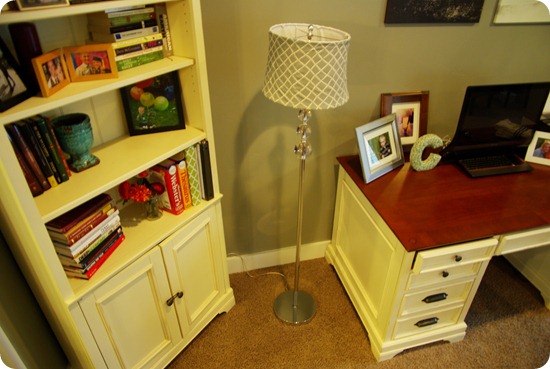
    We love our lamp.IMGP2390_thumb1

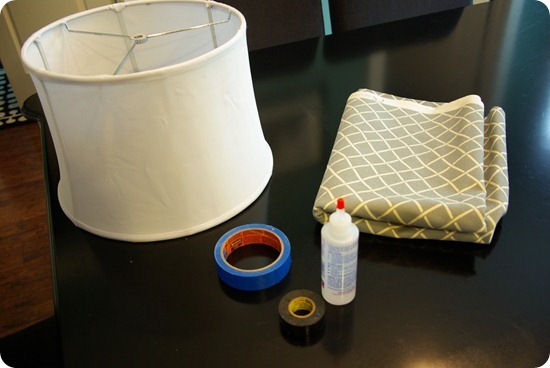
    Here’s how you do it: start with your shade, a fabric of choice—only about 1/2 yard depending on your shade size (I recommend a thicker décor fabric), fabric glue, fabric scissors, tape, and a pencil. Pretty simple so far, right?IMGP2377_thumb1
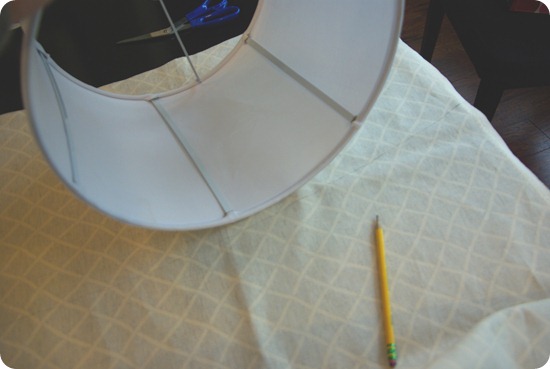
    Lay your fabric out with your shade. Place the shade in the middle, then roll it to the right to trace it’s angle to one side, then roll back to the middle, then roll to the left to trace its angle for the other side. Trace both the top and bottom of the shade as you roll it. This will ensure the fabric follows the shade curve.IMGP2378
    Next, add two inches to each side that you traced, and cut two inches away from this line. You’ll need to leave extra room on either side to fold. Then iron, iron, iron your fabric. Make sure all seams are out.

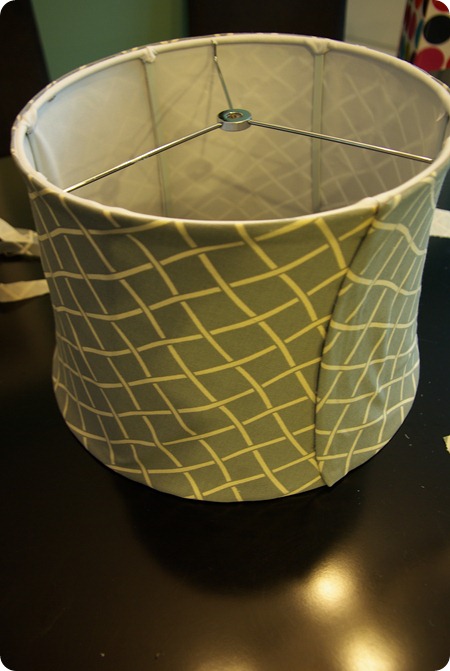
    Then, take the fabric end and match it up to your shade’s seam. Before you glue it, hold it in place to make sure it is aligned to cover the shade evenly as it rolls around. Then run your fabric glue along the seam and secure the fabric end. If you have a thick fabric, you won’t have to worry about the glue showing through; if you have a thinner fabric, smear the glue with a paintbrush. IMGP2379

    All other tutorials I read said to pull the shade around and tape it back at the original seam. I tried this and realized the shade wasn’t pulled nearly tight enough this way. I wanted it really really tight. So I began pulling the fabric as tight as I could, then gluing about every 6 inches around.

    By the time I’d glued it all the way around, it was tight and easy for me to cut and fold the ends in without disturbing the body of the shade.IMGP2380

    After it’s all glued, cut around each side, leaving about 1/2 inch of fabric to glue under. IMGP2384

    Then fold the seam under all the way around to make sure it looks even.IMGP2385

    And glue.IMGP2386

    When you get to your final edge, glue it under so it follows the shade’s seam nicely.IMGP2387
    That’s it! Very easy. Place your shade on and admire it.IMGP2397IMGP2399IMGP2395

    Tuesday, January 18, 2011

    Onesie/Burp Rag Gift Set

      No comments    
    categories: ,

    IMGP2404

    Using a plain onesie (I buy them a bit big, as the sizing is always too small, for Gerber anyway), measure and trace a shape or letter of your choice onto fabric. Cut it out and sew the edges back.

    IMGP2367IMGP2368

    Center width-wise and place a bit high on the shirt (so if the babe is wearing pants it won’t be covered). Sew through the middle and double stich around the edges.

    IMGP2370

    Pair with some matching burp rags for an easy but cute gift. For one friend I did this after the baby came so I could do an initial of her name on the onesie. Personalized baby stuff is the best!IMGP2375

    IMGP2402IMGP2406

    We had a last minute shower last week so I didn’t have time to make a blanket, but this was pretty quick.

    Monday, January 17, 2011

    Fabric Sale

      2 comments    
    categories: 

    Love getting home fabrics for $3/yard! More to come on my projects with these.IMGP2334IMGP2332

    Sunday, January 16, 2011

    Holiday Gifts

      No comments    
    categories: , ,

    This year I made Mitch’s family’s amazing caramels for gifts. More to come soon on that recipe.IMGP2253

    For my best friends I filled these mugs with the caramels:IMGP2231IMGP2225

    And for our neighbors we bagged them up.IMGP2297

    Happy, very very belated, holidays ;)

    Wednesday, January 12, 2011

    Whip up Something New

      2 comments    
    categories: ,

    My friend Elise recently set up a blog challenge called Whip up Something New for those of us who have lists, links, books, and stacks of recipes we want to try but haven’t had the time or energy to do so.

    The challenge is to create a new recipe each month and blog about it. Mine for January was Ina Garten’s Coconut Cupcakes. I’d heard so many heavenly things about this recipe over the years I was almost scared to make it… for fear that I would eat all of them in one sitting. Luckily at showers I can bring them all (or most of them) to give away and just keep a couple for sampling.

    IMGP2308IMGP2309IMGP2311And note that in the reviews some people omitted almond extract—I think that would be a mistake. It really makes the flavor rich. I actually added extra so it would taste like marzipan.

    Sunday, December 12, 2010

    More Baby Gifts

      1 comment    
    categories: , ,

    I’ve been sewing up a storm over the past couple months… many baby blankets, nursing covers, onesies, burp rags, etc. for friends and family having babies soon. I haven’t remembered to take pictures of them all, but here are some. These things have become my go-to gifts for showers.

    Blanket for my friend having a baby girl.P1060907It’s hard to see in the above picture, but this is the backing I use for my baby blankets… it is the softest thing I’ve ever felt, yet it’s thin and smooth so it sews well. I’m contemplating making myself a blanket with this!
    P1060890

    I am a huge fan of this binding—so silky.P1060905

    Here’s the nursing cover I made to go with it.P1060912

    And a set of matching burp rags.P1060900IMGP2248IMGP2242

    I have a couple more I wish I had shots of, so I’m hoping I can document better moving forward.