Monday, April 28, 2014

Mango Salsa Chicken Salad

  No comments    
Mango Salsa Chicken Salad

This is one of my favorite salad recipes! It is so easy, so healthy, and so fresh. You can add more of what you like or keep it simple.

Ingredients, Mango Salsa Chicken Salad

  • 4 chicken breasts
  • 2-3 c. mango salsa (we love the kind from Costco)
  • 1 head cleaned & chopped romaine lettuce
  • 2 bell peppers diced in strips
  • Olive oil
  • Fajita seasoning (I make it homemade with cumin, garlic salt, and chili powder)
  • 2 avocados
  • cilantro & lime for garnish
  • optional: cheese, tortilla strips, black beans (when I’m trying to keep it light I leave these off but they are delicious on top too!)
  • Cilantro lime ranch dressing (see recipe here)

Mango Salsa Chicken Salad

Directions:

  1. Start your recipe early in the day by placing your chicken in the crock pot and adding 1-2 cups of mango salsa. Cook on low for 4-6 hours or high for 3-4 hours.
  2. Once you are ready to assemble the salad, remove the chicken, cut it into chunks or shred it, and then add another 1 c. of mango salsa. Mix salsa in and set aside chicken in a bowl.
  3. Once you’ve cleaned and chopped your romaine, set that aside as well.
  4. Next, add a small amount of olive oil to a pan and saute the bell peppers with 1-2 tbsp. of fajita seasoning until soft.
  5. Dice avocados & limes, and prep any other toppings you’d like.
  6. Assemble salad by placing the chopped romaine in a bowl, then the sauteed bell peppers, then mango chicken, then top with avocados, lime juice, cilantro & dressing.
  7. Add any additional toppings you’d like!

Mango Salsa Chicken Salad

Tuesday, April 22, 2014

Cranberry Almond Bacon Broccoli Salad with Greek Yogurt Dressing

  1 comment    

Cranberry Almond Bacon Broccoli Salad with Greek Yogurt Dressing I love broccoli, I love cranberries, I love bacon, and I love almonds. You know what I don’t love about most broccoli salads? The dressing is STRAIGHT UP mayonnaise. All the recipes I look at are basically 95% mayo, 2% sugar, and 3% vinegar. I really just can’t stomach the idea of taking a piece of broccoli and dipping it in some mayo and eating it. So here is my broccoli salad that’s about 30% mayo in the dressing. It’s there as a base but you cannot taste it. I promise! Make this a couple hours before you’re going to eat, and chill in the fridge covered in saran wrap. It is SO delicious. Like it’s supposed to be a side salad but I just end up eating it as my meal.

Ingredients, Broccoli Salad:

  • 2 heads broccoli florets (chopped off the stems – I prefer them smaller but make them whatever size you like)
  • 1 c. dried cranberries
  • 1/2 c. sliced almonds
  • 1 package bacon, cooked and diced into small pieces
  • 2 handfuls of spinach leaves
    • Dressing:
      • 1/2 c. plain greek yogurt
      • 1/2 c. mayonnaise
      • 1/4 c. honey mustard dressing
      • 1/4 c. vinegar
      • 1/4 c. honey
      • 2 tsp. minced garlic
      • juice of 1 lemon
      • 1/4 tsp. salt

Cranberry Almond Bacon Broccoli Salad with Greek Yogurt Dressing

Combine all salad ingredients and set aside. Whisk dressing ingredients together in a medium sized bowl pour slowly over salad. I like to pour about half, mix up the salad, then pour more as needed. You don’t want it to be over dressed but you want it coated. Cover the bowl with saran wrap, stick in the fridge until you’re ready to eat. You can serve it right when you make it but I think an hour in the fridge makes the flavors really come together. Enjoy!

Cranberry Almond Bacon Broccoli Salad with Greek Yogurt Dressing

Saturday, April 19, 2014

Lemon Salmon with Creamy Dill Sauce

  No comments    

Lemon Salmon with Creamy Dill Sauce

A couple weeks ago I made this when friends came over for dinner. I always get nervous making a new dish when guests come but yet I ALWAYS seem to be doing it! Oh man I don’t know why I do that to myself. But this was amazing. Like delicious. I tripled the sauce recipe because it was that good. And then that week I ate it on salads and and sandwiches (like the turkey club I just posted). Please make this salmon next time you need a nice but easy meal. It is delicious.

Original recipe from Cooking Classy here. GREAT site!!

Ingredients, Lemon Salmon with Creamy Dill Sauce:

  • 4 6-oz salmon fillets
  • 2 Tbsp extra virgin olive oil
  • 1 1/2 tsp lemon zest
  • 2 Tbsp fresh lemon juice
  • Salt and freshly ground black pepper

    Creamy Dill Sauce (I tripled this! But do what you think is best ;)

    • 1/3 cup fat free plain Greek Yogurt
    • 3 Tbsp mayonnaise (full fat)
    • 1 clove garlic, finely minced (I used minced garlic in olive oil)
    • 1 Tbsp chopped fresh dill (They were out of fresh dill at my grocery store so I used dried and chopped it up and it was still so good)
    • 2 - 3 tsp milk
    • 1/2 tsp honey
    • Salt and freshly ground black pepper

Lemon Salmon with Creamy Dill Sauce

  • Preheat oven to 400 degrees. In a bowl, whisk together olive oil, lemon zest and lemon juice. Grease a 13 by 9-inch baking dish and place salmon fillets in baking dish. Season tops of salmon with salt and pepper then rotate to opposite side. Drizzle tops evenly with lemon mixture and gently rub over salmon, then season tops with salt and pepper. Let rest at room temperature 10 minutes, then bake in preheated oven 12 - 16 minutes, or until salmon has cooked through (cook time will vary based on thickness of fillets and how well done you liked them). Serve warm topped with Creamy Dill Sauce.
  • For the sauce:
    • In a bowl, mix together Greek yogurt, mayonnaise, garlic, dill, honey, and enough milk to reach desired consistency. Season with salt and pepper to taste. Store in refrigerator, allow to rest at room temperature 20 minutes before serving (just so it's not ice cold over warm salmon).

Recipe Source: Cooking Classy

Lemon Salmon with Creamy Dill Sauce

Friday, April 18, 2014

Chocolate Chip Butterscotch Oatmeal Walnut Cookies

  No comments    

Chocolate Chip Butterscotch Oatmeal Walnut Cookies Pretty much all my favorite cookie ingredients rolled into one cookie!! Adapted from my traditional chocolate chip cookie with more butter and more salt (the extra salt is crucial with all the extra sweets going in!).

Ingredients, Chocolate Chip Butterscotch Oatmeal Walnut Cookie

  • 1 c. butter (2 sticks)
  • 3/4 c. brown sugar
  • 1/2 c. white sugar
  • 1 egg
  • 1 tsp. vanilla
  • 2 c. flour
  • 3/4 tsp. baking soda
  • 2 tsp. salt
  • 1/2 c. chocolate chips
  • 1/2 c. butterscotch chips
  • 1/2 c. chopped walnuts
  • 1 c. rolled oats

Drop onto cookie sheet and slightly flatten. Bake at 350 degrees for approximately 8-9 minutes each. You have to take them out the minute you see any brown, then though they’ll still be soft let them sit on the cookie sheet about 10 minutes after they’re out of the oven, to continue cooking through. Enjoy!

Chocolate Chip Butterscotch Oatmeal Walnut CookiesChocolate Chip Butterscotch Oatmeal Walnut Cookies

Turkey, Bacon, & Avocado Club with Creamy Dill Sauce

  No comments    
Turkey Bacon Avocado Club with Dill Sauce

I made this creamy dill sauce a couple weeks ago for a delicious new salmon recipe I tried (recipe coming soon!) and after we had lots of leftover sauce. I couldn’t stop putting it on everything. It’s so delicious and made mostly of greek yogurt so I don’t feel bad eating it. We tried it on some club sandwiches the other week and it was so yummy.

Ingredients, Turkey Bacon Avocado Club with Creamy Dill Sauce:

  • Nice bread or buns, or bagels (I used potato bagels which are so so soft), toasted
  • 3-4 slices of bacon per sandwich
  • Turkey slices (I like the thick cut herbed turkey from Costco)
  • Avocadoes
  • Tomatoes
  • Cheese, optional (I actually like mine without cheese … there’s so much else going on)
  • Salt/pepper to taste
  • Creamy dill sauceTurkey Bacon Avocado Club with Dill Sauce

Ingredients, Creamy Dill Sauce

  • 1 c. plain greek yogurt
  • 1/4 c. mayonnaise
  • 3 tsp. minced garlic
  • 2 tsp. honey
  • 3 tbsp. chopped dill
  • 2-3 tbsp. milk
  • salt to taste

Directions, creamy dill sauce: Whisk all ingredients except milk together. Slowly add milk until you reach a smooth consistency that’s not too runny. Turkey Bacon Avocado Club with Dill SauceTurkey Bacon Avocado Club with Dill SauceTurkey Bacon Avocado Club with Dill SauceTurkey Bacon Avocado Club with Dill Sauce

Wednesday, April 9, 2014

The Complete Cafe Rio Sweet Pork Salad / Cafe Rio Copycat Salad

  No comments    

Cafe Rio Complete Sweet Pork Salad Recipe

Okay as promised here is the mammoth all-encompassing, start to finish Cafe Rio Sweet Pork copycat recipe. I have made this dozens of times and experimented with what I like best and don’t like best about other recipes. If you have not had a Cafe Rio sweet pork salad, then add this to your menu for next week. Seriously your family/spouse/roommates will thank you. It is so fresh and delicious but so filling and satisfying.

As I shared in my Cilantro Lime Cafe Rio Ranch post the other day, I also have made a couple shortcuts to make it easier. I love the site that I adapted most of these recipes from (Fav Family Recipes) but I don’t think there are enough tips for shortcuts. If I made it as directed on the site I’d be cooking for 4 hours straight right before dinner. Here are my tips here for helping it run smoothly when making, especially if making for company:

  1. Make the dressing ahead of time. This can be the morning of or even the night before. Just make it and put it in a sealed container in the fridge. No hassle right before meal time!
  2. Buy pre-shredded cheese. I usually don’t buy this, but with such a time-intensive recipe, this saves me time and cleanup when we’re making it for guests.
  3. Cook the pork in the water/garlic salt all the way through in the morning, then shred it, clean out the crock pot, and put back into the crock pot with enchilada/coke sauce and simmer all afternoon. This not only makes the meat so so delicious but saves you from having to deal with almost any cleanup right before dinner. This will just be ready whenever you are ready to eat.
  4. Prep all the sides you can the morning of the meal, or several hours before. I wash and chop all the romaine and then put it in a huge serving bowl in the fridge, so it’s chilled and ready to go. I also put the tortilla strips, mango salsa, quartered limes, cilantro sprigs, & cojita cheese in serving bowls, and set out all the ingredients for the rice and black beans next to the stove. Then bean and rice, and the guac & tortillas are the only things I have to prep right before dinner.
  5. Buy a tortilla warmer. These things are amazing. After a friend brought the tortillas for a dinner at our house one night, we were so impressed. She’d made them at her house and we ate them 45 minutes later and they were still steaming hot! She bought one for us after and we use it all the time. Then we can prep our tortillas an hour before company comes and they are still hot when we need to eat. If you don’t have one, just get everything else done and you can be making the tortillas as guests arrive.

Complete Cafe Rio Pork Salad, Ingredients (adapted from Fav Family Recipes), Serves 8-10:

  • 8-10 large cooked tortillas (we like the Tortilla Land ones you buy uncooked and make at home)
  • Shredded cheese, Mexican blend, optional
  • Cafe Rio Sweet Pork (see below)
  • Cafe Rio Cliantro Lime Rice (see below)
  • Cafe Rio Black Beans (see below)
  • 2-3 heads lettuce, cleaned & chopped (not iceberg, use leafy green or Romaine)
  • Mango salsa or pico de gallo (*the original recipe calls for homemade pico de gallo (diced tomatoes, diced onion, cilantro), but we love love love these salads with mango salsa from Costco. It tastes better than the original to us, and is easier because this is pre-made. But do whatever you think you’ll like best!)
  • Easy guacamole (1-2 mashed avocadoes, sprinkled with chili powder and garlic salt)
  • Tortilla Strips (we purchase these in the produce area near the salad toppers/croutons/nuts)
  • Cotija cheese, crumbled (or you can use any shredded cheese)
  • Fresh cilantro, for garnish
  • Limes, quartered for garnish & juice on top
  • Cafe Rio Cilantro Ranch (click here)
  • Aluminum deep dish pans (*Optional, but make it easier to eat and look great – get these round cake pans in the baking aisle or near the tupperware & baking dishes)

Directions for assembling the salad, once all ingredients are made:

  1. Place 1-2 cooked tortillas in the bottom of an aluminum tin. At Cafe Rio they put cheese on the tortilla and melt in a hot oven, which you can do, but we don’t do this step because the tortillas taste great on their own.
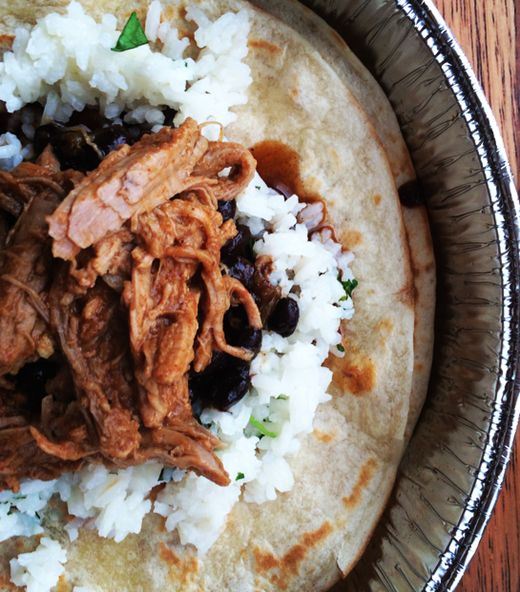
  2. Once you have your tortillas ready, with or without cheese, add a large spoonful of rice, then beans, then pork, then lettuce. On top add mango salsa, cojita cheese, then sprinkle the tortilla strips and any cilantro you’d like on top. We love adding guacamole too.
  3. Top with cilantro lime ranch and a squeeze of lime. Be ready to be in food heaven. And then be happy you have days worth of leftovers to keep this meal on repeat ;)

Ingredients, Cafe Rio Sweet Pork:

  • 2 pound pork tenderloin/roast (I love the ones at costco that come in a 2-pack. These have been the best/most juicy I’ve tried.)
  • 2 tsp. garlic salt
  • 1 c. water
  • 2 cans Coke (NOT diet)
  • 1 can diced green chilies
  • 1 10oz can red enchilada sauce
  • 1 c. brown sugar

Instructions:

  • Place pork in crock pot. Add 1 c. water and 2 tsp. garlic salt. Cook on high for about 3-4 hours (or until it shreds easily, but don't let it get TOO dry) or on low for 8 hours. Remove pork from crock pot and drain any liquid left in the pot. Shred pork. (Note the original recipe calls to cook the pork with coke and brown sugar but I’ve found cooking with the sugars doesn’t make it as moist and the sugary liquid can dry out the pork a little. If you cook it this way and then add the coke/enchilada sauce mixture after it tastes amazing!).
  • In a food processor or blender, blend 2 cans coke, chilies, enchilada sauce and remaining brown sugar (about a cup, you can add a little more or less to taste..). If it looks too thick, add more Coke little by little.
  • Put shredded pork and sauce in crockpot and cook on low for 2 hours. Serve with tongs.

Cafe Rio Sweet Pork Recipe

Ingredients, Cafe Rio Cilantro Lime Rice

  • 1 c. uncooked rice (long-grain, white rice)
  • 1 tsp. butter or margarine
  • 2 cloves garlic, minced
  • 1 tsp. freshly squeezed lime juice
  • 1 can (15 oz) chicken broth
  • 1 cup water
  • 1 Tbsp. freshly squeezed lime juice
  • 2 tsp. sugar
  • 3 tablespoons fresh chopped cilantro

Instructions

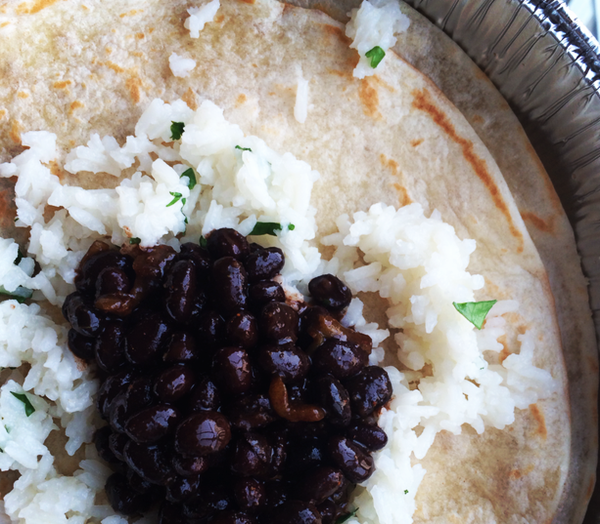
    • In a saucepan combine rice, butter, garlic, 1 tsp. lime, chicken broth and water. Bring to a boil. Cover and cook on low 15-20 minutes, until rice is tender. Remove from heat. In a small bowl combine lime juice, sugar and cilantro. Pour over hot cooked rice and mix in as you fluff the rice.
Cafe Rio Complete Sweet Pork Salad Recipe

Ingredients, Cafe Rio Black Beans

  • 2 Tbsp. olive oil
  • 2 cloves garlic, minced
  • 1 tsp. ground cumin
  • 1 can black beans, rinsed and drained
  • 1 small can green chiles (optional) 
  • 1 1/3 c. tomato juice
  • 1/2 tsp. salt
  • 2 Tbsp. fresh chopped cilantro

Instructions

    • In a nonstick skillet, cook garlic and cumin in olive oil over medium heat until you can smell it. Add beans, green chiles, tomato juice, and salt. Continually stir until heated through. Just before serving stir in the cilantro.
Cafe Rio Cilantro Lime Rice & Beans Recipe

Ingredients, Cilantro Lime Ranch (link here to post):

  • 1 bottle, ranch dressing
  • 3 tomatillos, chopped
  • 1 jalapeno, chopped + deseeded
  • 1 clove garlic, chopped
  • juice of 1 lime
  • 1/2 bunch cilantro leaves

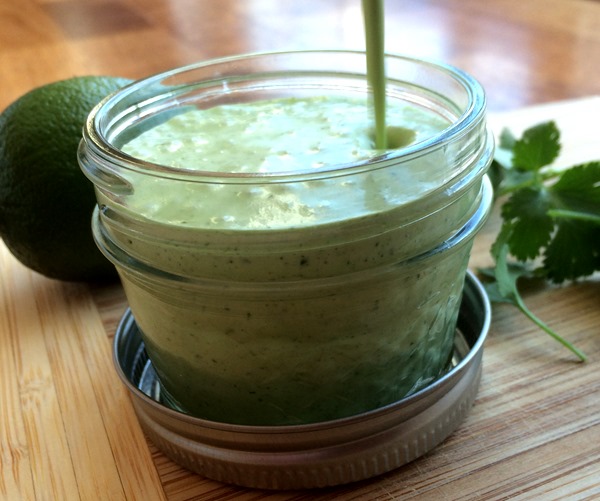
Dump ingredients into a food processor or high power blender and puree. That’s it!  Cafe Rio Cilantro Lime Ranch Recipe  Cafe Rio Complete Sweet Pork Salad Recipe   Cafe Rio Complete Sweet Pork Salad Recipe
Saturday, April 5, 2014

General Conference Printables | April 2014

  3 comments    

General Conference isn’t even over yet and already it’s been such a wonderful experience. Two weekends a year our church holds a general conference to address all our members and any visitors or investigators, worldwide. It takes place in Salt Lake City but is broadcast across the world. Every 6 months, year after year, my prayers and questions are answered, and often on the first day of general conference! I am so grateful for a gospel and faith that teaches us so much and allows us also so much personal opportunity to learn for ourselves through personal revelation.

Here are some printables from today’s sessions of conference. I love that these quotes are so applicable to all of us, not just Mormons ;) Click the image to access the downloadable PDF links.

Printable_BecomePrintable_ChristlikeLove

Tuesday, April 1, 2014

Cilantro Lime Ranch / Cafe Rio Copycat Dressing

  No comments    

Cilantro Lime RanchWhen we moved to Minnesota I quickly began tinkering with Cafe Rio copycat recipes to avert my strong cravings for their delicious fresh Mex. There is nothing like Cafe Rio here. Even the places that attempt fresh Mex just don’t get it right. Oh it is sad. I miss it. But I have found some amazing recipes and made some substitutions that make the food taste just like Cafe Rio and can be done really easily! The first I’ll be posting is the Cilantro Lime Ranch dressing. This dressing is just plain delicious. We sit and eat it with tortilla chips dunking each one in to get tons of dressing. It’s that good. I might dream of drinking it. Just kidding. But really it’s delicious on everything, not just Cafe Rio salads. We marinate chicken in it, put it on regular salads, use it as a dip, and more.

The original recipe I found calls for a packet of Ranch powder (MSG!), buttermilk, and mayonnaise. Not only are these things not on hand in my house, but they aren’t super healthy and they are expensive (Ranch packets are a rip off! Hidden Valley charges like $2 for 1 pack!).  So I’ve substituted and found you can easily replace these with a bottle of your favorite ranch (I love Briana’s ranch!).

Ingredients, 6  Ingredient Cilantro Lime Ranch / Cafe Rio Ranch Dressing:

  • 1 bottle, ranch dressing
  • 3 tomatillos, chopped
  • 1 jalapeno, chopped + deseeded
  • 1 clove garlic, chopped
  • juice of 1 lime
  • 1/2 bunch cilantro leaves

Dump ingredients into a food processor or high power blender and puree! That’s it! And then you don’t have to fuss with mayonnaise. You’re welcome.

5 Ingredient Cilantro Lime Ranch / Cafe Rio Ranch Copycat 5 Ingredient Cilantro Lime Ranch / Cafe Rio Ranch Copycat

Monday, March 31, 2014

Mexican Sweet Potato Bowls

  No comments    

Mexican Sweet Potato Bowls

I found a recipe on one of my favorite sites a couple weeks ago with sweet potato skins and lots of mexican ingredients inside. Here is the original recipe from Pinch of Yum (all of her recipes are delicious!) I decided to replicate using what I had on hand, and keeping a little more than just the skin of the sweet potatoes in the recipe (I love love sweet potatoes. Can’t get enough. Make them all the time with just a drizzle of olive oil and some S+P. Please don’t put sugar on them for me. Or marshmallows!).

Mexican Sweet Potato Bowls, serves 4-6:

  • 1 crock pot recipe of shredded mexican chicken, see it here (Cafe Rio copycat chicken is my fave for many Mexican dishes)
  • 3-4 sweet potatoes, halved
  • 1 red pepper
  • 1 red onion
  • 1 tbsp. butter or oil
  • chili powder
  • garlic powder
  • cumin
  • 1 can corn, rinsed and patted dry
  • 1 can black beans, rinsed and drained
  • 1 teaspoon salt (+ more to taste)
  • grated cheese, optional
  • cilantro for garnish

INSTRUCTIONS

  1. Preheat oven to 350 degrees. Bake the sweet potatoes for 45-60 minutes.
  2. While sweet potatoes are baking, place corn in a heavy cast-iron skillet over medium-high heat with no butter or oil. Sprinkle with salt and other Mexican seasoning (as much as you want). Do not stir! Let corn roast for several minutes before stirring. Let it roast for a few more minutes before stirring again. Continue this for about 10 minutes, until corn is browned and roasted on the outside. Set aside in a small bowl with the black beans.
  3. Saute the onion & pepper in the butter over medium heat until soft and translucent. Season with chili powder, garlic powder, and cumin. Set aside.
  4. Remove sweet potatoes from the oven when fork-tender. Let cool for 5-10 minutes. Scoop out some of the sweet potato insides (I used this inside part mashed up for my kids!). I left more than just the skins as the recipe calls for. It tasted delicious with a good amount of sweet potato in there!
  5. Fill the bowls with the corn, black beans, chicken, and garnish with cilantro and/or cheese.
  6. Scoop the filling into the skins and top each with 1 tablespoon shredded cheese. Broil for about 5 minutes or until cheese is melted.

Mexican Sweet Potato BowlsMexican Sweet Potato Bowls  Mexican Sweet Potato Bowls

Cafe Rio Chicken

  No comments    

Cafe Rio Chicken

A couple weeks ago we had the most amazing Sweet Potato Bowls for dinner, which I’ll be posting about next, but first I wanted to share the chicken recipe. It was DELICIOUS. The seasoning was just so good and the meat the perfect texture from cooking all day in the crock pot on low. I used this copycat Cafe Rio chicken recipe from Today’s Creative Blog.

Ingredients, Cafe Rio Crock Pot Shredded Chicken:

  • 2 pounds chicken - boneless & skinless
  • 1/2 cup zesty Italian dressing
  • 1/2 tablespoon minced garlic (I use more like a full tablespoon)
  • 1/2 tablespoon chili powder
  • 1/2 tablespoon ground cumin
  • 1 (1 oz) packet Ranch Dressing Mix (mix with 1/2 cup water)

Instructions

  1. Place all your ingredients except for the chicken into your crockpot. Stir.
  2. Add your chicken
  3. Cook on high for 5-6 hours or low for 7-8 hours. I flipped the chicken half way through.
  4. Once your chicken is done, remove just the chicken and shred using 2 forks. Replace the shredded chicken back into the crockpot and mix well with the left over juice.
  5. Serve in salads, burritos, tacos, burrito bowls!

Cafe Rio Chicken  Cafe Rio Chicken

Monday, March 24, 2014

Cadbury Mini Egg Easter Hot Fudge Sundae

  No comments    

Cadbury Mini Egg Hot Fudge Sundae

My love for mini eggs causes me to do all kinds of crazy things like eat half a bag in one sitting or brainstorm recipes I can use them in, as an excuse to pick them up at the store. And when they started making the Christmas versions it was all over because now I have an excuse to purchase these twice a year instead of just around Easter. Oh Mini Eggs. Stop being so delicious. And cute.

Here’s my version of a delicious sundae with mini eggs:

  • My recipe for homemade hot fudge sauce (here)
  • Vanilla ice cream
  • Cadbury Mini Eggs

I like to fill the dish part way with hot fudge, then add ice cream, then mini eggs, then more ice cream, and top with hot fudge and more mini eggs, but do it however you’d like! The best bites are those with lots of hot fudge and a mini egg, so it’s slightly melty when you eat it. This will be the easiest and most delicious treat you can quickly whip together after Easter dinner. Enjoy!

Cadbury Mini Egg Hot Fudge SundaeCadbury Mini Egg Hot Fudge SundaeCadbury Mini Egg Hot Fudge Sundae

Thursday, March 13, 2014

Indian Spiced Chicken with Masala Tomato Cream Sauce

  No comments    

Indian Spiced Chicken with Masala Tomato Cream Sauce

Last week I tried a new recipe for our family, and I have to say hands down it was one of the best meals I’ve ever had. Mitch and I were debating over who should get the leftovers the next day for lunch! Honestly if you like Indian food you have to make this. I got the recipe from Seasons & Suppers here. I adapted a couple things like leaving out potatoes. I had them on hand but decided not to use them because I’ve been trying to cut down on my starches… and I did make basmati rice with the dish so I didn’t think it needed potatoes (though I’m sure they’d be delicious!).

Ingredients, Indian Spiced Chicken with Masala Tomato Cream Sauce (adapted from Seasons & Suppers):

  • 3 Tbsp. oil
  • 5 large boneless chicken breasts
  • Kosher salt and freshly ground pepper
  • 1 small onion, finely chopped
  • 4 garlic cloves, chopped
  • 1 Tbsp. finely grated ginger
  • 1 6oz. can of tomato paste
  • 2 tsp. garam masala
  • 2 tsp. ground cumin
  • 2 tsp. ground turmeric
  • 1 1/2 tsp. ground coriander
  • 1/2 – 3/4 tsp. cayennne pepper (depending on how spicy, you like it or you can omit)
  • 3/4 teaspoon ground cardamom
  • 3 cups low-sodium chicken broth (plus a bit more, for thinning, if necessary) – I used 4 cups total
  • 1 cup heavy cream (can use a lighter cream)
  • For serving: Plain yogurt,  cilantro, & rice (basmati is best with indian food!)

  1. Heat vegetable oil in a large Dutch oven over medium heat. Season chicken with salt and pepper and 1 tsp of the garam masala and cook on each side until cooked through. Cook until golden brown, about 8–10 minutes. Transfer chicken to a plate.
  2. To the same pot, add onion, garlic, and ginger to pot and cook, stirring occasionally, until onion is very soft and golden brown, about 8–10 minutes. Add tomato paste, more garam masala, cumin, turmeric, coriander, cayenne and cook, stirring often, until tomato paste is beginning to darken, about 4 minutes.
  3. Add chicken pieces, chicken broth, and cream to pot. Season with salt and pepper and bring to a boil. Reduce heat and simmer, partially covered, until chicken is tender and liquid is slightly thickened, about 30 minutes - 1 hour (or you can transfer to the crock pot on high for 2 hours). If using bone-in chicken, remove chicken to a plate and carefully remove chicken from the bone and discard skin and bones. Cut or pull chicken into bite-sized pieces. Return chicken pieces to the pot.
  4. If sauce is too thick, thin with a bit more chicken stock.
  5. To serve, spoon stew into a shallow bowl and place a large dollop of yogurt on one side. Sprinkle with some fresh chopped mint, cilantro or parsley and serve with naan on the side. Alternately, spoon stew over some warm basmati rice.

I topped with a huge dollop of FAGE greek yogurt and cilantro and then served over basmati rice. Just looking at the pictures is making me crave this again! SO delicious. Please make asap ;)Indian Spiced Chicken with Masala Tomato Cream Sauce Indian Spiced Chicken with Masala Tomato Cream Sauce

Monday, March 10, 2014

1 Hour Handmade Baby Blanket - Tutorial

  5 comments    

1 Hour Handmade Baby Blanket - Tutorial

I’ve been neglecting other parts of this blog I’d like to keep up like parties and design and sewing too. I often finish a shower or party or project and realize I forgot to document it. But such is life! Mom brain gets the best of me.

This project is my go-to for my friends having babies. I like to have something that’s 1) a gift you really need (I can never have enough soft blankies for my kids, especially cute ones!), 2) something that I can put a little love into by making it personal (the absolute best part is picking out fabric for someone that you think matches their taste), and 3) something that is unique and kind of my “thing” for gift giving. I try to make them for all my close friends’ babies. I am by no means a great sewer, but I can sew straight and iron well, and that’s half the battle I believe. I started trying to improve my sewing skills after my first baby was born and I had some more time at home. I struggled through many terrible blankets until I found a design I loved, that was easy, and that was a really useful and comfortable baby blanket. I love these! I have them down to the point I can sew one start to finish in an hour! And I’m sure if you try it out you can do it too!

Directions, one-hour handmade baby blanket:

  • 1 yard, fabric of your choice (it really takes about 3/4 yard but the shape is such that it’s just better to get a yard, and have some scraps to make a cute coordinating gift with, or save for a quilt. 
  • 1 satin blanket binding (you’ll also have a little leftover here, but 1 pack is almost the perfect size!)
  • 1 piece minky fabric – 28 x 34 inches, cut (I prefer the white, flat minky without lots of fluff or any patterns. I think it looks better and doesn’t shed as much, but I’ve used thicker minky when I couldn’t find thin minky and it’s worked really well!! I usually get mine on Fabric.com)
  • White thread
  • Thread to match blanket binding
  • And all your sewing supplies (iron, scissors, measuring tape, etc.).
  1. To start, iron your fabric out until smooth. Lay out your fabric face down on the floor or a table or other wide/flat surface. Lay your minky (face up) over the fabric, being careful to closely align the edges and corners. If you can use the edges that are already cut straight as your guide it will ensure you get a straight blanket.1 Hour Handmade Baby Blanket - Tutorial
  2. Then begin cutting. I do have a rotary cutter but this surface is too big for that so I just use scissors! I’m not the world’s best cutter but I can usually get my blankets pretty even by using the fabric pattern as a guide. For example this floral blanket has tiny dots I could easily cut along. Most have some kind of repeating pattern you can follow for guidance. If not I’ve also made tiny lines with a pencil.1 Hour Handmade Baby Blanket - Tutorial
  3. Once you’re done cutting, smooth out the minky and keep the pieces held tightly together, aligning the corners, as you transfer it to your sewing station. I do this every single time and it keeps me from having to pin anything. I am not a perfectionist but I promise if you can keep everything aligned you don’t need to pin! 1 Hour Handmade Baby Blanket - Tutorial
  4. Once you sit down at your sewing machine, you are ready to sew a line down the middle of the blanket, to keep the fabrics from separating when washed. Fold your blanket in half (hamburger style, hehe, if anyone remembers that from elementary school). Put your finger at that center fold and that is where you will begin sewing your first line. I just put it right under my machine’s foot, clamp it down and begin my stitch there. I start with a short backstitch, and then again use the pattern on the fabric as my guide to sew a line straight down the middle of the blanket. I usually use white thread for this but if you have a really dark fabric you can just use whatever is the most discreet color. At the end I again backstitch and then I breath a sigh of relief that the pieces are together now without me having to obsessively clamp them with my hands at the corners to make sure no shifting occurs ;) 1 Hour Handmade Baby Blanket - Tutorial
  5. Now, smooth out each side of the blanket and you’re going to do a stitch right around the edge, all the way around. No one will see this because the binding will cover it, and I’ve even made some without this stitch and just attached the binding right on, but I think it makes the blanket more sturdy and long lasting.
  6. Once that rough outline stitch is done you’re ready to attach your binding. Get out your satin blanket binding and warm up your iron. They are usually pretty creased. Run a quick but hot iron over the binding to get the creases out.
  7. Now to attach the binding, start with one corner. Fold the binding over the edge, making sure to cover your rough stitch from earlier. Don’t pull it around the edge too tight or the binding will wrinkle and warp as you sew it on. Clamp it under the machine foot, once you get it placed over the first edge. I usually sew it on about 1/4 inch up from the side of the binding to ensure it isn’t too close to the binding edge. Sew a little and then flatten the binding out around the blanket, sew a little more, and continue to do this down the first side. The hardest part will be the corner. 1 Hour Handmade Baby Blanket - Tutorial
  8. Once you get to the corner, stop your stitch and remove the needle. Pull the blanket out and fold a 45 degree angle at the corner. Make sure the back is folded nicely too. You can pin it or I just hold it tight and clamp it under the foot, and begin my stitch down the next side. Once I’ve stitched all 4 sides, I go back and sew down each corner with a full backstitch and then front stitch up each 45 degree angle. 1 Hour Handmade Baby Blanket - Tutorial 1 Hour Handmade Baby Blanket - Tutorial 1 Hour Handmade Baby Blanket - Tutorial1 Hour Handmade Baby Blanket - Tutorial
  9.   Once you’re done with the corners, I go back around and stitch another rectangle over my first binding stitch just to hold everything in place. Also a couple times I’ve had some binding miss the thread on the first stitch around (it was sewn on the front, but didn’t catch on the back because it was too close to the edge), and it’s nice to have that second stitch to make it a little more baby proof. That’s it! Really it’s very very simple!

1 Hour Handmade Baby Blanket - Tutorial1 Hour Handmade Baby Blanket - Tutorial