Tuesday, October 8, 2013

Sticky Cream Cheese Cinnamon Rolls with Lion House Dough

  2 comments    
categories: , , , ,
The Best Sticky Cream Cheese Cinnamon Rolls
Over the past 10 years I’ve made a lot of different cinnamon roll recipes. I’ve tried different types of dough, some fillings with nuts, some without, different frostings and glazes… and only in the past year have I really gotten down what I think is the BEST recipe. The dough is so fluffy and light it rises quickly and makes for the softest pull-apart bready portion of the roll. But the filling is gooey enough that while the outside layers of roll are bready and light, the inside is gooey and dripping with melted cinnamon/sugar/butter mixture. Also a cream cheese frosting is a must, but I’ve found it’s best to make it a little differently than a traditional cream cheese buttercream—so it melts better on the top of each roll. Okay now that I’m salivating (!) I’ll get into the recipe.
First off, I start with the Lion House roll recipe for the dough. Of any dough I’ve made this is ALWAYS the best. It has an egg and melted butter and powdered milk in it so the dough is super soft, and I add extra yeast so it rises quickly and softly.
Dough:
  • 2 tablespoons dry active yeast (the recipe calls for 2 but I use 4 tablespoons)
  • 2 cups warm water
  • 1/3 cup sugar
  • 1/3 cup butter, melted
  • 2 tsp salt
  • 2/3 cup nonfat dry milk
  • 1 egg
  • 6 cups flour
Filling:
  • 1 c. packed brown sugar
  • 2 1/2 tablespoons ground cinnamon
  • 1/3 c. butter softened
Cream cheese frosting:
  • 1/3 c. butter softened
  • 1/2 package cream cheese, softened
  • 2-3 c. powdered sugar
  • 1 tsp. vanilla
  • 5-8 tablespoons of milk, as needed
Dissolve yeast in water. Add all ingredients except 3-4 cups of flour in a stand mixer, and mix with dough hook until smooth. Gradually add the remaining flour. Turn out onto floured surface and knead gently until dough is soft and incorporated.  Place dough in a greased bowl, cover with a towel or plastic wrap, and let rise until doubled, about an hour. (When you add more yeast the dough rises faster—I find my first rise only takes 30-45 minutes for my dough to double. You should try it!)
After dough has risen, punch down and knead into ball. Roll out onto floured surface. Roll into a large rectangular shape. *In the past I’d seen recipes indicating roll the dough as thin as possible to get as many layers of cinnamon roll as possible, however I’ve found that by leaving the dough a little thicker it rises much better and stays much fluffier throughout the 2nd rise and baking process. The cinnamon rolls don’t have as many layers but they are much much better!
Once the dough is rolled out, use your hands to spread 1/3 c. softened butter over dough. Then mix packed brown sugar with cinnamon. Sprinkle cinnamon and sugar mixture evenly over dough. Roll dough into vertical log (notice how loosely I rolled it).Dough Prep: The Best Sticky Cream Cheese Cinnamon Rolls
Cut dough at approximately every 1 inch to make 12-18 rolls depending on how big each roll is (I made a pan of 10 and saved the extra dough for some cinnamon bread). Here’s what my rolls looked like just after cutting and placing in a 9x13 pan (sprayed with cooking spray):The Best Sticky Cream Cheese Cinnamon Rolls
Cover and let rise for 15 minutes on top of stove. Meanwhile set stove to 200 degrees F to keep the area around the rolls warm. After they’ve risen, place them in the 200 degree oven for 5 minutes, then turn the temperature up to 350 degrees F and bake for 15-18 more minutes (don’t open the oven door when you raise the temp).
While the rolls are baking, prepare your frosting. In a stand mixer whip butter and cream cheese as hard as the beater will go. Cream cheese is finicky and you have to beat it hard to get the lumps out and make sure it’s fully incorporated into the butter and whipped. Then turn down the speed and add the powdered sugar slowly, alternating with a bit of milk. Add vanilla. Continue adding powdered sugar and milk until you get a smooth consistency, slightly thinner than traditional butter cream. You want the frosting to melt easily on the rolls so it will almost be a mixture of icing and frosting—not too thin but not too thick.
Pull them out and frost immediately! I like to frost each one individually rather than slathering frosting on the whole pan at once.
The Best Sticky Cream Cheese Cinnamon RollsThe Best Sticky Cream Cheese Cinnamon Rolls
The Best Sticky Cream Cheese Cinnamon Rolls The Best Sticky Cream Cheese Cinnamon Rolls

Monday, October 7, 2013

No Pasta Cauliflower Mac N Cheese

  40 comments    
categories: , ,

Cauliflower Mac N Cheese2 I’ve seen lots of recipes lately for cauliflower mac n cheese. I was skeptical—how could a mac n cheese without pasta be good?? Well I loved this. I have to say though you can’t expect it to taste just like pasta, but it is still delicious. The mustard in the cheese sauce really made it for me.
Ingredients:
  • 1 head cauliflower
  • 4 tbsp cream cheese
  • 1 tbsp. mustard (any kind)
  • 1 and 1/2 c. cheese (1/2 c. reserved for top)
  • Splash of cream
  • garlic powder
  • salt and pepper to taste
Chop the heads off the cauliflower and steam until soft. Once soft drain and return to saucepan. Add cream cheese, cheese and cream and stir until incorporated. Add mustard, garlic powder, and salt pepper to taste. Be careful, it is delicious!
Add mixture to a baking dish, cover with remaining 1/2 c. cheese and top with pepper and then broil until bubbly. Even my husband who loathes cauliflower loved this! (I mean obviously you can barely taste the cauliflower with all the cheese ;)
imageimage

Saturday, October 5, 2013

General Conference October 2013

  3 comments    
categories: , ,
Doubt Your Doubts Two weekends a year our church holds a general conference to address all our members and any visitors or investigators, worldwide. It takes place in Salt Lake City but is broadcast across the world. It is so uplifting to hear words of encouragement, prayerful guidance, and stories of others. Here are a couple printables I threw together after feeling inspired from the first part of this conference today. If you’re curious at all about what we LDS people believe, just visit our website to watch or learn.
So many of the quotes we hear are helpful to everyone, not just those of our faith. Click the photos to access the downloadable PDF links.MercifulGold2

Friday, October 4, 2013

Parmesan Meatball Subs

  No comments    
categories: , , , ,
Parmesan Meatball Subs
My husband is not a big fan of sandwiches for dinner… unless they are hot. When you’re eating cold sandwiches for lunch at least 3 days a week the last thing you want to have for dinner is a cold sandwich! (Well him anyway, I could eat a cold veggie or turkey sandwich probably for every meal ;)
Meatball subs are such an easy and yummy meal. I was already buying ground beef for another meal when I was doing my weekly shopping, and then I saw day old bakery hoagie rolls on sale so I quickly swapped out another meal for the week and replaced it with this. Bonus was I already had italian bread crumbs and fresh mozzarella at home too! I love planning meals out that work with the same ingredients so I don’t have to buy as much.
There are a couple ways you can make meatballs—some people pan sear them, then bake them or just bake them—I like to bake them and then throw them in the crock pot with tomato sauce to let them simmer. Then I can get dinner ready in the afternoon and it’s still hot by dinnertime. Also helps the flavors meld together. Here’s what you’ll need:
Ingredients:
  • 1 package soft hoagie rolls or nice bread
  • Fresh parmesan cheese (mozzarella works great too if you don’t have parm)
  • Tomato sauce (I used jarred sauce this time but you can make your own too if you have some old over ripe tomatoes! Here is the link for homemade tomato sauce.)
  • 1/2 lb. – 1 lb. ground beef
  • 1-2 c. Italian bread crumbs (or you can use plain bread crumbs and season them with italian seasoning)
  • 1 egg
  • Garlic powder
  • Salt/Pepper
  • Cooking spray
IMG_1177First get out a baking sheet and spray with cooking spray. Set aside. Preheat oven to 400 degrees F. In a medium sized bowl turn out meat, crack egg, and dump in bread crumbs. Depending on how much meat you have you may have to add more bread crumbs. The more bread crumbs the easier the meatballs are to roll, but they are juicier with fewer bread crumbs.
Take off your rings and mash together with your hands.Then add 1 tsp of garlic powder and a couple shakes of salt and pepper. Mash together until the meat mixture doesn’t stick to your hands. Roll out into 1 inch size balls and cook at 400 degrees F for 15-20 minutes. Break open a meatball to see if they’re done. The number of meatballs will depend on how big you make them, but this made me about 15.
Dump a jar of tomato sauce into the crock pot and set it to low. Spoon cooked meatballs into the crock pot and let simmer until dinnertime (if you need them ready faster just put them on the stovetop in a saucepan with red sauce). Spoon over soft hoagie rolls and top with grated cheese. Serve immediately! My husband likes to eat 2 or 3 sandwiches because they are that good… so make enough! This is also a great meal for parties or get togethers because you can keep the meatballs warm in the crock pot. IMG_1179

Homemade Coconut Syrup Dirty Diet Cokes

  2 comments    
categories: , ,
Dirty Diet Cokes1 A couple weeks ago I had a bunch of girlfriends over for Dirty Diet Cokes and games. If you’ve never heard of or had a Dirty Diet Coke you should probably stop what you’re doing and go get the ingredients to make one. They are delicious and they really don’t even taste like Diet Coke!
Dirty Diet Coke = Diet Coke, Coconut Syrup + Lime Juice (And a splash of half & half if you’re daring or in the mood for a creamy delight)
To make these, grab a large glass or plastic cup and fill halfway with crushed ice (crushed is much better for these, trust me!), then pour 3 tbsp (or 4!) of coconut syrup over the ice. Then fill with cold Diet Coke until you’re about an inch from the top of the glass. Then squeeze in 1/4 lime’s juice. And if you’re up for it add a splash of half & half. Then drink with a straw. The straw helps it from tasting as watery if you drink with the ice hitting your mouth. Pretty scientific huh??
When we first made these with some friends in Park City we couldn’t find coconut syrup at any stores so we decided to make it. It’s really easy! Just make a simple syrup (one part sugar to one part water – if you want to make the syrup sugar free use a sugar substitute like splenda), boil the sugar and water together until dissolved, then remove from heat and add coconut extract. Below are the measurements. I like to let the syrup cool, then transfer to a sealable pitcher or old water or juice bottle and keep in the fridge.IMG_1312 Homemade Coconut Syrup:
  • 1 c. white sugar (or sugar substitute – look for conversion chart on package)
  • 1 c. water
  • 3 tsp. coconut extract
Dirty Diet Cokes:
  • 1 cup of crushed ice
  • 1 can chilled Diet Coke
  • juice of 1/4 lime
  • 3 tbsp. coconut syrup
  • optional: splash of half & half
IMG_1318

Thursday, October 3, 2013

Cake Mix Banana Bread

  No comments    
categories: , , ,
CakeMixBananaBread
I love making banana bread from scratch but lately I’ve found myself throwing out bananas once they get past the point of eating because I don’t have time to make it from scratch. I saw a recipe for cake mix banana bread—just use a yellow cake mix—and decided to try it last week when I needed to make some treats for a friend. I used only 2 eggs instead of 3. Instead of oil I added in 2-3 mashed bananas (and added some cinnamon and nutmeg). I also added chocolate chips. Though I know it wasn’t healthy at all, this was seriously some of the best banana bread I’ve ever had. Ever.
Next time you see some old bananas and don’t have time for a lengthy recipe, find a cake mix in your pantry! I’m sure you could use white or spice too.
IMG_1015
IMG_1019IMG_1017

Tuesday, October 1, 2013

Sizzling Chicken Fajitas

  No comments    
categories: ,
Chicken Fajitas One thing I love to order at Mexican restaurants are their sizzling fajitas. I don’t know why having the food made fresh to order just makes it feel healthier. I love that you can assemble them how you’d like too! We make these at home all the time and everyone can make them how they like. Here’s how I make them:
Ingredients:
  • 4-5 chicken breasts (thawed if frozen)
  • 2-3 tbsp olive oil
  • 1-2 bell peppers, any color, diced in strips
  • one onion, diced
  • homemade taco seasoning (chili powder, garlic powder, cumin – a little cayenne if you want it really spicy ;)
  • diced tomatoes
  • salsa
  • homemade guacamole (1-2 avocadoes, mashed with chili powder and salt/pepper to taste)
  • shredded cheese
  • corn or flour tortillas
To get the meat and peppers sizzling at the table, you need to prep the other ingredients first. I like to set the table and then place bowls of finished ingredients on the table as I’m done—grate the cheese, chop tomatoes, pour salsa into a bowl, get out the tortillas, and make the guac. Place it all on the table. Then chop the peppers and onion. Then you’re ready to make the chicken.
When making fajitas I like to use frozen chicken and thaw it for an hour or two before I cook. Then when I slice the chicken, it will be a tiny bit frozen and slices really nicely. You can get great thin strips for the fajitas.
Thaw the chicken, slice it up, throw it in a warmed skilled with the olive oil. Cover and cook, occasionally stirring and rotating the chicken so it cooks on both sides. Once it’s cooked, add the chili powder, garlic powder, and cumin (and cayenne!).Add the diced bell peppers and onions, cooking again until veggies are done.
Bring the sizzling food in a bowl to your table, and be ready to eat your fajitas right away! They are best when the meat and peppers are hot so it slightly melts the cheese.
IMG_0656IMG_0655

Monday, September 30, 2013

Chocolate Cream Pie {French Silk Pie}

  No comments    
categories: ,
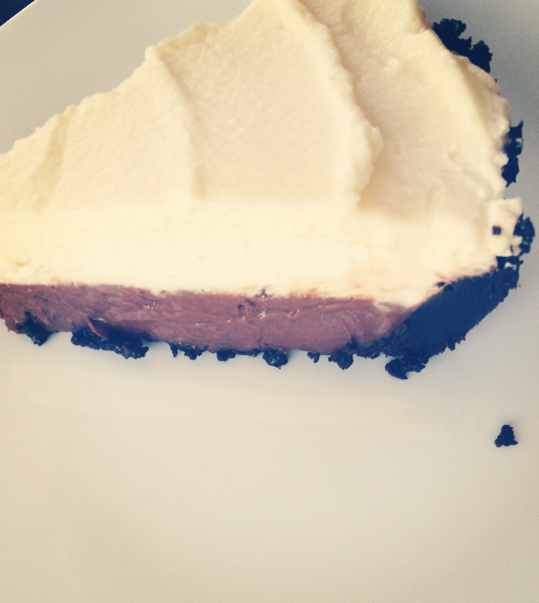
Chocolate Cream Pie
We sure love cream pies around here. While cooking for company last night I was in desperate need of a dessert without many ingredients on hand. I had everything for a chocolate cream pie except for eggs (for the chocolate custard filling). I lucked out and found a recipe for chocolate cream pie filling with no eggs. And it was insanely delicious filling. I couldn’t stop eating it! I would make it again and just eat the filling like pudding if I didn’t have Oreos on hand for the crust next time ;)
I used this recipe from Food.com for Eggless Chocolate Cream pie filling for the filling and then just added an Oreo crust and whipped cream.
Ingredients:
  • Crust: 25 oreos, 1/4 c. butter melted
  • Cream filling:
    • 2/3 cup sugar
    • 1/4 cup cocoa
    • 3 tablespoons cornstarch
    • 1/4 teaspoon salt
    • 1 2/3 cups milk (I used 1 c. heavy cream and 2/3 c. milk)
    • 2 tablespoons butter
    • 1 teaspoon vanilla
  • Whipped cream: 3 c. heavy cream, 5 tbsp. white sugar, 1 tsp. vanilla
For the crust: crumble Oreos in food processor. Slowly add butter. Press into pie dish and freeze while preparing filling.IMG_1074
For the filling:
  • Combine dry ingredients and gradually stir in milk/cream.
  • Cook over medium heat, stirring constantly.
  • Bring to a slow boil, and stir constantly one minute.
  • Remove from heat, and stir in butter and vanilla.
  • Fill dessert dishes or pie shell, and chill until cool.
  • Makes 4-6 pudding servings or filling for 8" pie.
IMG_1041
IMG_1126IMG_1125  IMG_1116

Rotisserie Chicken – Chicken Noodle Soup

  No comments    
categories: ,
Chicken Noodle Soup
I love rotisserie chickens because they are easy, inexpensive, and they taste so good! Last week I made this soup when I didn’t have much time to get dinner ready. It is quick and delicious.
Ingredients:
  • 1/2 white or yellow onion, diced
  • 1 c. chopped or shredded carrots
  • 1/2 – 2/3 of a rotisserie chicken, meat shredded or chopped
  • 1/4 c. butter
  • 1/2 box short cut pasta (I used bow-ties), cooked
  • Chicken broth or stock
  • Seasonings: parsley, garlic, salt, pepper
In a saucepan over med-high heat, melt butter. Toss in diced onions and cook until almost soft (cover while cooking so they steam and don’t burn). Add carrots and cover again. Cook until carrots and onions are soft. Add chicken meat and sauté until chicken is warm. Turn heat down to medium and add cooked pasta. Then add enough chicken broth to cover all ingredients and then add more to make it as “brothy” as you’d like. Add 2-3 tbsp of parsley, chopped and 1-2 tsp. of garlic powder. Amount will vary on how much broth you use. Salt and pepper to taste. Simmer until all ingredients are warm. The butter makes it a little bit creamy which we love.  IMG_0800

Friday, September 27, 2013

The Best Chocolate Frosting

  No comments    
categories: , ,
 
Old Fashioned Chocolate Fudge Frosting
I came across this frosting a couple years ago in my quest to recreate Magleby’s Chocolate Cake. I love it because it tastes like an old-fashioned fudge frosting. It is delicious! Please make it on your next chocolate cake. Oh it is so good. It comes from Hershey’s. I got the Hershey’s chocolate recipe book one year as a gift and found this gem though I don’t love most of the recipes in their book. Here is the recipe:
"PERFECTLY CHOCOLATE" CHOCOLATE FROSTING:
  • 1/2 cup (1 stick) butter, melted
  • 2/3 cup HERSHEY'S Cocoa
  • 3 cups powdered sugar
  • 1/3 cup milk
  • 1 teaspoon vanilla extract
Melt butter. Stir in cocoa. Alternately add powdered sugar and milk, beating to spreading consistency.
Add small amount additional milk, if needed. Stir in vanilla. About 2 cups frosting. Old Fashioned Chocolate Fudge Frosting Old Fashioned Chocolate Fudge Frosting Old Fashioned Chocolate Fudge Frosting

Thursday, September 26, 2013

Disneyland Cornbread

  1 comment    
categories: , ,
 Disneyland Cornbread
I don’t make cornbread often but I keep seeing recipes for Disneyland Cornbread and I’ve been dying to try it, only because it involves a yellow cake mix. Yes, sounds totally unhealthy but how interested are you in trying it now?!
The recipe is not even really a recipe. It’s boxes. 2 boxes of corn muffin mix and 1 of yellow cake mix. Tough huh? Make the recipes as directed on the boxes and mix together, throw in a 9x13” pan, and bake for about 30 minutes at 350 degrees F.
The best way to top is with honey butter. Just soften some butter, mix in some honey and whip with a whisk or fork. Yum. We had it this weekend with some amazing chili my friend brought for dinner. Mmmm.IMG_0772IMG_0773

Wednesday, September 25, 2013

Easy Walnut Chicken Salad

  2 comments    
categories: ,
Walnut Chicken Salad2 Whenever we have leftover chicken meat from a rotisserie chicken I love to make chicken salad. I don’t know why I love chicken salad so much, but I really do, especially with walnuts! The walnuts really break up the creamy and salty flavors of the chicken and mayo. Next time you have some extra meat on your rotisserie chicken, shred it up and throw it into a chicken salad. Chill it and use it on sandwiches (or just eat it out of the container ;)).
Ingredients:
  • Approx. 1/3 rotisserie chicken meat, shredded and cut into small pieces
  • 1/4 – 1/2 c. mayo
  • Approx. 1 c. chopped/halved walnuts
  • 1/2 head chopped lettuce
    • Chopping lettuce: Clean a full head of romaine, in-tact, pat dry with paper towels, lay it on a cutting board and chop it into shreds. For chicken salad I try to use the crunchier bottom part and hearts of the romaine, then save the leafier green top part for salads. Then it won’t wilt in the chicken salad.
IMG_0419  Combine ingredients and chill. IMG_0719

Tuesday, September 24, 2013

Food Storage Chocolate Chip Cookies

Food Storage Chocolate Chip Cookies
Last week I lead an enrichment lesson with women at church about food storage meal planning. I honestly only got asked because I mentioned to a friend earlier in the summer an article I’d found on Pinterest about food storage meal planning. I had a short amount of time to try to learn as much as I could about meal planning with food storage. Out of this “research” came some recipes I’ve adapted to only use shelf-stable ingredients. These cookies are one of those adaptations.
I love Chocolate Chip Cookies. Like I cannot make them just for our family because I will eat way too many. I’ve made a rule I can only make them for something or for somebody, leaving us with only a few to eat with our family. This recipe is adapted from my basic Chocolate Chip Cookie recipe, substituting shortening for butter and applesauce for eggs. {I use applesauce for eggs all the time and it works so well! Try it if you’re out of eggs or want to reduce cholesterol/fat. Another post coming soon about meal-based food storage!)
Ingredients:
  • ¾ c. shortening
  • ¾ c. brown sugar
  • ½ c. white sugar
  • 1/3 c. applesauce
  • ¾ tsp. vanilla
  • 2 c. flour
  • ¾ tsp. baking soda
  • ¾ tsp. salt
  • 2 c. chocolate chips
Directions:
Beat shortening in mixer for 1 - 2 minutes until fluffy, and then add sugars. Continue beating for several minutes. While whipping sugar and shortening, combine dry ingredients (flour, salt, baking soda) in a separate bowl. Mix well. Add applesauce and vanilla to shortening/sugar mixture and fully incorporate. Slowly add dry mixture to butter/sugar/applesauce mixture. Incorporate.
Add chocolate chips to mixture. (I actually like to beat half the chips for a second in the mixer; it breaks some of the chips up so there are tiny pieces of chocolate throughout the cookie, then add the rest.) Scoop heaping spoonfuls of batter and drop onto ungreased cookie sheet. Bake at 365 degrees for 9 - 11 minutes. Take out the second they start turning brown. Cookies will look a bit underdone, but leave them on the tray for 5 - 10 additional minutes to finish the cooking process. Remove to a cooling rack once the bottoms are solid.
IMG_0652


Monday, September 23, 2013

Simple Blackberry Ice Cream

  1 comment    
categories: , , ,
  Blackberry Ice Cream 2 Last night we had some friends over for dinner and I started making some frozen custard, but as I was cooking the eggs and cream I was chatting and let them cook too long… All our eggs and our custard was ruined! I was so frustrated! I remembered one time making ice cream without eggs (just cream, milk, sugar, vanilla), so I searched for that recipe—it is from our ice cream maker booklet, which I was lucky to find online! It’s the Cuisinart Ice Cream maker and here is the link to the PDF of their recipes. I used the Simple Vanilla Ice Cream (page 3) as the base for this recipe. Then just add 4 cups of blackberries that are sprinkled with sugar.
Ingredients:
  • 1 1/2 c. whole milk
  • 3 c. heavy cream
  • 1 c. + 2 tbsp. granulated sugar
  • pinch table salt
  • 1 1/2 tbsp. vanilla
Then I added:
  • 4 c. blackberries (with a dusting of sugar, mixed together) – add these after the ice cream starts getting thicker in the machine
  • (Italian waffle cookies—we found these at Costco and they are the perfect addition to a bowl of homemade ice cream! They taste like a waffle cone only with a stronger vanilla flavor and have a great texture.)IMG_0680
Whisk ingredients together in a bowl. The recipe says to chill it 2 hours beforehand but we didn’t have time for that and it still turned out delicious and creamy! We just poured into the ice cream maker. After about 20 minutes we added the blackberries and after about 35 minutes we took it out of the ice cream maker. It was still pretty soft so I’d recommend chilling it another hour or two before serving.
This recipe is SO much easier than most other ice creams I’ve made (no eggs, no cooking) and tastes just as good. I think this will be my new go-to in the future.
IMG_0769
IMG_0768

Thursday, September 19, 2013

Thai Chicken Salad

  No comments    
categories: , ,
Thai Chicken Salad
I found the original recipe for this salad here and altered it slightly based on what I had at home, and based on the fact that we can’t have peanut products in our house because of my son’s allergy. Here is what I used for my adapted recipe.
  • 2 cups sliced matchstick carrots
  • 1 yellow bell pepper sliced thin
  • 1 small bag baby spinach
  • 1 cup sliced cucumber
  • 2 chopped green onions
  • 4 cooked chicken breasts, shredded or cut in small pieces (I cooked these in the crock pot with soy sauce, honey, and red pepper flakes)
  • cilantro for topping of salad
  • limes for juice & garnish For chicken coating:
  • juice from 2 limes
  • 2 tbsp olive oil
  • 2 tbsp low sodium soy sauce
  • 1-2 tbsp honey
  • 3 tbsp almond butter 
  • a pinch of red pepper flakes
Instead of dressing the salad with the thick almond butter dressing, I removed the chicken from the Crock Pot, sliced it up, and mixed it with the dressing. Then I mixed up the veggies in the salad bowl and topped it with the chicken. The dressing is so delicious! I think I added a bit more red pepper flakes than I’d intended because the chicken was pretty spicy!! But we liked the spicy taste with the sweet honey. Taste as you’re making it to see how spicy/sweet you want it to be. And surprisingly the almond butter worked as a great substitute. I’ve made this kind of chicken before with peanut butter before we had kids and this tasted almost exactly the same.
Also, dress with lots of lime juice! It helped really add freshness to the salad. IMG_0513

Tuesday, September 17, 2013

Oatmeal Cream Pies

  No comments    
categories: , , , ,
OatmealCreamPies
For the past couple weeks I’ve been seeing these recipes everywhere! They keep making me salivate and I’ve been wanting to try them but didn’t have a reason to until last night. I have to be cautious to not make sweets too much otherwise we end up eating all of them! Last night we had a get-together with friends and I finally had an excuse to make these.
They were so good. You should go make them this instant. And you probably have everything on hand. Honestly I was sad I only got to eat one because they went so fast!
I found the recipe on Pinterest one day. The blogger indicated these were an original recipe from her mom’s collection and she displayed a snapshot of the recipe card they came from. I took a screen shot of the recipe card so I’d have it handy, but when I went to find the blog I could not for the life of me find it with many searches on Pinterest and Google. Here is the recipe card—if this is your recipe or if you know where it came from please let me know! It was amazing! I’ve seen a lot of these cream pie recipes and the consistency doesn’t look quite right… this recipe made large thin cookies that were soft and chewy. Mmmm.
IMG_0389 My only change to this recipe was adding a little more flour than called for. It was so wet and sticky I didn’t see how I could even scoop them onto the baking sheet.  IMG_0449
Ingredients for cookies:
  • 1 1/4 c. butter, softened
  • 1 c. brown sugar
  • 1/2 c. white sugar
  • 1 1/2 c. flour (I used almost 2 c.)
  • 3 c. oats
  • 1 egg
  • 2 tsp. vanilla
  • 1 tsp. baking soda
  • 1/2 tsp. salt
  • 1/4 tsp. cinnamon
Cream butter and sugars in mixer. Meanwhile mix dry ingredients together. Add eggs and vanilla to butter mixture. Cream. Add dry mixture to butter mixture. Drop by rounded spoonfuls onto a parchment lined cookie sheet. Bake at 375 for 10 minutes. Let cool on pan before removing (so they don’t crack).
Ingredients for cream filling:
  • 1/2 c. butter
  • 2 c. powdered sugar
  • 1-2 Tbsp. heavy cream (I didn’t have cream so I used milk)
  • 4-5 Tbsp. shortening** (This wasn’t part of the original recipe but it needed something to taste lighter and fluffier. This was the perfect trick. Made it taste more like cream filling and less like a buttercream frosting.)
  • I also added 1 tsp. of vanilla
Cream all ingredients together until frosting is a light and whipped consistency. Frost insides of cookies once completely cool! Store with parchment paper between them to keep them from sticking. They are CHEWY!IMG_0447 IMG_0440