Monday, August 26, 2013

Chili Garlic Butter Pan-Seared Steak

  No comments    
categories: , ,
Chili Garlic Pan Seared Steak I’ve been married for 8 years and just cooked restaurant style steaks for us for the 1st time last week. Can you believe it? I’ve made sliced steaks for fajitas and for beef with broccoli, but never have I had to make one that is done well on the outside, juicy in the center, not tough, melts in your mouth, and is essentially the entire focus of the meal. I was a little nervous but I found a great Alton Brown recipe that helped me master the steak cooking. I then added some of the homemade chili garlic butter I made for the asparagus (below) to it, for a restaurant feel (it was our anniversary). I love a good flavor infused butter on a steak.
Here is Alton’s recipe I used:
- 1 rib eye steak or 2 New York strip steaks, 1 1/2-inch thick (I used strip steaks and got the smallest ones I could find – with so much else in the meal I didn’t want to be too full from steak)
- vegetable oil, to coat (I used olive oil)
- kosher salt & fresh ground pepper
Directions:
1 Remove steak(s) from fridge and start bringing them to room temperature.
2 After 30 to 45 minutes, place a 10 to 12-inch cast iron skillet in oven and heat oven to 500 degrees F.
3 When oven reaches temperature, remove the pan and place it on a burner over high heat.
4 Coat steak(s) lightly with oil and season both sides with a generous pinch of salt. Grind on black pepper to taste.
5 Immediately place steak(s) in the middle of the hot, dry pan. Cook 30 to 60 seconds without moving. Turn the steak(s) with tongs and cook another 30 to 60 seconds, then put the pan straight into the oven for 3 to 5 minutes. Flip steak(s) and cook for another 3 to 5 minutes. (The time in the oven depends on how rare you like your steaks. The time given is for medium, but depends on number of steaks, etc. as well.)
6 Remove the steak(s) from the pan, cover loosely with foil, and rest for 2 minutes.
7 Serve whole or slice thin and fan onto plate.
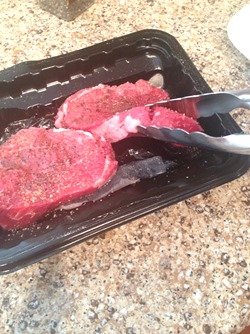
I oiled and seasoned one side of the steaks while still in their package, then used tongs to turn them onto a plate and season the other side.IMG_9274IMG_9275IMG_9276  
I slightly altered how I cooked them. Alton said to only sear the front and back side, but I looked at an Ina Garten recipe and it said to sear all sides, even the thin sides, to lock in the juices. Ina never fails me so I did it that way!
{If you make these be sure to remember the pan is searing hot from preheating in a 500 degree oven. I forgot the handle was hot and burned myself! Just another mom brain moment.}
IMG_9295  
Sear all sides then put back in the oven for 4 minutes on front side and 4 minutes on back side for medium (3 minutes for rare and 5 minutes a side for medium well). Top with some of the chili garlic butter, and serve hot. I think I need to start making steak more. This was delicious. steak

Wednesday, August 21, 2013

Parsley & Cream Smashed Potatoes

  No comments    
categories: , ,
Parsley and Cream Potatoes One thing I love about eating at nice restaurants is their mashed potatoes. Nearly all nicer seafood and steak restaurants I’ve eaten at don’t mash their potatoes 100%, which allows you to taste the actual potatoes (and not just the cream ;). I think whipped creamy potatoes can be nice with turkey dinners or for other occasions, but smashed potatoes taste richer to me.
Most mashed potato recipes I’ve used or made include lots of garlic—don’t get me wrong I love garlic, but I can’t stand the terrible breath and taste in my mouth all day after eating them. These smashed potatoes are made with parsley and cream so they are rich and delicious but without the after taste.
Here’s what you’ll need: potatoes (I love Yukon Gold but any kind is fine!), cream, parsley, salt, pepper, and some form of butter (I like to use Smart Balance). IMG_9229First get a pot of water heating up on the stove, so it can warm while you cut the potatoes. Then clean the potatoes and chop them into approximately similar sized chunks. If you’re in a rush to make them you could always chop them super small so they cook more quickly. IMG_9233IMG_9236
I like to put the diced chunks into the bowl I will serve them in. This helps me to see how much I need and also keeps me from using another dish.
Once the water is simmering, lower the chunks in with a slotted spoon (this keeps the water from splashing or burning you).IMG_9237
Once the potatoes are fork soft (about 8 minutes), strain them and place back in their bowl. Add 1 tbsp of butter for every 2 potatoes you used. Then eyeball the cream… if you like thinner potatoes add more, thicker add less, but enough to coat them while mashing.IMG_9281
Here’s how I keep them from being over-mashed—smash them with a fork. When I’m making potatoes for Thanksgiving and everyone wants them super whipped and creamy to eat with the gravy I’ll use an electric mixer, but for this I use a fork.
Smash away! Leave as many chunks as you’d like. Don’t worry they’ll still be soft. And it’s a great way to relieve aggression! IMG_9282
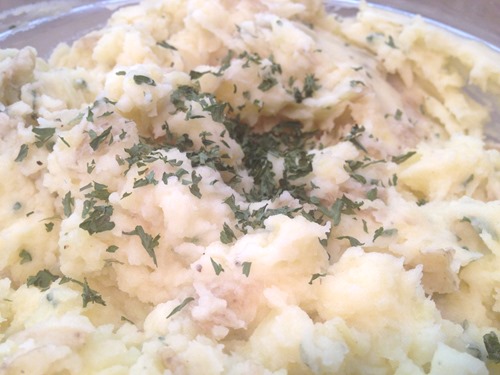
Next add salt and pepper to taste and mix together. Then add the parsley. I love the clean and fresh taste of parsley, and I also love that it isn’t overpowering. I add a generous amount to the potatoes, mix them in, and then add more as a garnish on top.IMG_9283
One of the best things about these potatoes is they are fresh, but you always have dried parsley on hand. Fresh parsley is even better if you have it! I don’t have a garden but when I buy it fresh I always try to make these potatoes because it’s so yummy fresh.IMG_9289
IMG_9290
Here’s a little trick I use every time I make mashed potatoes. Make them first and then stick them in the microwave (turned off) just to store them and keep them warm while you’re making your other food. It’s tough to have everything ready and warm at the same time while keeping your kitchen clean, so this helps me keep them out of the way. Then when it’s time to eat I just turn on the microwave for a minute and get them nice and hot before serving. The microwaving doesn’t affect the consistency which is nice.IMG_9293IMG_9297

Tuesday, August 20, 2013

Seared Asparagus with Homemade Chili Garlic Butter

  No comments    
categories: , , ,
Chili Garlic Asparagus
I love making flavored butter for dishes, especially veggies. Asparagus doesn’t seem to need too much additional flavor but the chili was a nice kick.
Here’s what you need: Chili powder, cayenne pepper, garlic salt, and any kind of butter (3-4 Tbsp). I used Smart Balance. I love it because it’s dairy free and also because it is easy to work with and spreads nicely out of the fridge. (Also you need asparagus ;)IMG_9240
Instead of cutting off the ends, I like to snap them where they naturally break. After washing just quickly grab some of each bunch and snap away.IMG_9247  Once cleaned and snapped, set aside.
For the butter, I like to scoop with with my tablespoon to know how much I’m using.IMG_9252 
Place the butter in a small bowl or dish. (Kind of looks like ice cream ;)IMG_9257
Then add 1 tsp of chili powder, 1/2 tsp of garlic salt and 1/4 tsp – 1/2 tsp of cayenne powder (depending on how hot you’d like it).IMG_9262
Next mash the butter with a fork and then whip until creamy. IMG_9264  
  Then turn it out onto saran wrap and roll into a log. Place in the freezer until you’re ready to cook the asparagus (I usually make it last thing before a meal is ready to serve so it’s fresh!).IMG_9270
Once it’s chilled, slice it in pats.IMG_9301
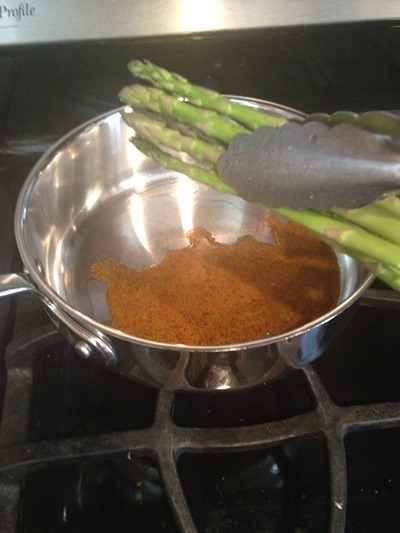
Place several pats in a pan over high heat. Once melted and when the pan is hot, place asparagus into pan. Cover and sear for 5-7 minutes until asparagus is bright green.   IMG_9294IMG_9299
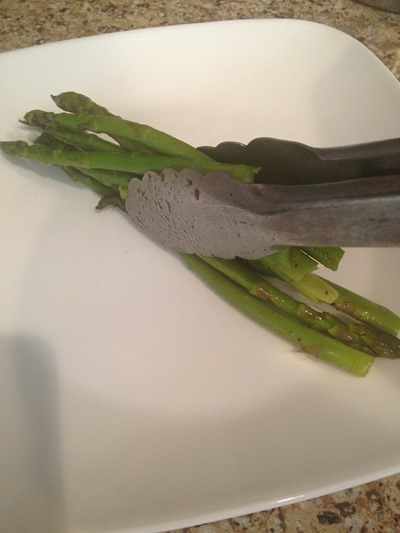
Plate and serve with more butter on top.
IMG_9303
Perfect with some chili-garlic steak and parsley cream mashed potatoes. Tutorials on those coming later this week.Asparagus

Monday, August 19, 2013

My Grandma’s 4 Ingredient Hot Fudge Sauce

  1 comment    
categories: , ,
This recipe has been with the women in my family for generations. My great grandma taught it to my grandma who taught it to my mom who taught it to my sister and I. It is the original “magic shell” gooey, gets sticky when it hits the ice cream, tastes like spoonfuls of buttery chocolate hot fudge. So much better tasting than store bought.
HotFudge
Ingredients:
- 1/2 c. cocoa powder
- 1 1/4 c. white sugar
- 1/4 c. (1/2 stick) butter)
- 1 tsp. vanilla
- a little trickle of water
In a saucepan measure out cocoa powder and sugar. Whisk dry ingredients together and then hold saucepan under the sink faucet and add a tiny amount of water, just enough that the mixture can be stirred together with the whisk (estimated a couple tablespoons).
Whisk until sugar, cocoa, and water are well combined. Place onto stovetop on medium-high heat and bring to a simmer/slow boil. Let simmer for 1 minute, then remove from heat, add vanilla then butter and continue to whisk. Let cool for a couple minutes before serving over ice cream if you’d like it to have a thicker texture, but serve immediately if you like it runnier.
Stores great in the fridge and can be reheated. It is thick, chocolatey, buttery, and delicious. We make it whenever we have friends over for ice cream. And kids love it! We also love Neapolitan ice cream.
IMG_9332 IMG_9345IMG_9340

Friday, August 16, 2013

The Food Your Kids Love…

  No comments    
categories: , ,
KidFavorites
A constant battle I face as a mom (to kids who are very scant and picky eaters) is what to make for dinner. They love their fruits and even some veggies, but they won’t touch a lasagna, taco, salad, soup, or anything mixed up for that matter with a 10 foot pole. When we serve meals like pasta dishes or rice and veggies they end up eating about nothing and asking for a snack before bed. We try and will keep trying to get them to like these meals but on the weekends it’s nice to have a break and give them some food they love (i.e. chicken, fries, etc.). I’ve heard these kinds of meals referred to as the “400 degree special”. One mom blogger I read wrote something about how she’d let her kids throw anything frozen on a pan and bake everyone’s at 400 degrees… burritos, pizza rolls, fries, etc.
As someone who tries to eat very clean (and worked at a health food store in college), I never thought I’d be a mom to let my child eat french fries or fried chicken at home for dinner! But after having kids you learn that sometimes you do need to give in (albeit not every day). To ease my mind and try to help our kids get slightly healthier versions of these frozen favorites, I have some tips for making them healthier.
French Fries: the best tip to make these healthier is to spend an evening once a month chopping potatoes and putting them in Ziploc bags to freeze. Just toss them in a bag with a little bit of olive oil and some salt, then seal tightly and freeze for up to a month.
%20%28Bill%20Hogan/Chicago%20Tribune%29
If you have to buy from the store, make sure you read the labels. Buy french fries without additives especially hydrogenated oils (which are linked to colon cancer).
Fried Chicken: make sure when buying these to avoid patties, nuggets, and anything that contains random parts of chicken meat mashed together. Try to buy all breast meat chicken.
My kids don’t like hamburgers but they do like hot dogs. I always buy Hebrew National kosher all-beef hot dogs. They don’t contain corn syrup or mechanically separated meats like lots of hot dogs, but they do contain nitrites which are still harmful and linked to cancer. Eat hot dogs sparingly, but when you do choose a good quality hot dog!
Also, my last trick for “unhealthy food night” at our house is green juice. We love making green smoothies for breakfast, but at dinner this Naked juice comes in handy. It’s full of fruits, vegetables, and nutrients. Also it’s sweet so my kids LOVE it. They will drink a huge 64 oz bottle in 2 days! (Also the cheapest place to find this is Costco! It’s $2 cheaper than Wal-Mart and $3 cheaper than Target.) Add this to your kids’ meals and you can feel a tad healthier on those lazy dinner nights.

Thursday, August 15, 2013

Homemade Pico de Gallo

  No comments    
categories: , ,
PicoDeGallo
Pico is one of those sides to a meal that is fresh and easy to make, yet I rarely find myself thinking to make it. Pico tastes great with any Mexican dish you make—enchiladas, tacos, chimichangas, taco salad, nachos, etc. I made it last weekend to pair with some enchiladas and I have to say it was a great complement to the creaminess of the enchiladas. Pico just makes anything taste fresh.IMG_8975
Here’s how I made mine: 
- Fresh cherry tomatoes (1-2 handfuls), 1/2 bunch fresh cilantro, one large red tomato from the vine, 1/4 diced onion, garlic salt and black pepper to tasteIMG_8980IMG_8969IMG_8968 
IMG_8973
Dice all ingredients and combine to taste. Tastes great chilled as well

Saturday, July 27, 2013

Fresh Corn & Avocado Salad

  7 comments    
categories: , , , ,

I found this recipe from Authentic Suburban Gourmet. It is the PERFECT salad for summer! I cannot tell you how fresh it tastes. Just make it. Every BBQ or party I’ve taken it to it’s been a total hit and people are scarfing it down. It’s healthy and it’s delicious. So nice to have some healthy options at summer parties or picnics. And because it’s meat free, dairy free, grain free anyone can eat it.
IMG_6283
Here is her recipe. My only advice is don’t use all the dressing or it will get a little too soggy at the bottom (and  dress it right before you’re going to eat it).
Also, I doubled the recipe for a large BBQ and omitted the Feta cheese.
Ingredients:
5 Ears Corn, husk removed, brush with olive oil and grilled, remove corn with sharp knife
2 Avocado’s, diced and sprinkled with lemon juice to prevent browning
2 C. Tomatoes, red and yellow cherry variety or equivalent
1 Small red onion, finely diced
¾ C. Feta, crumbled
1 ½ C. English cucumber, skin on and chopped small dice
Add to a large bowl and refrigerate until ready to use.
Cilantro Vinaigrette
6 T. Olive oil
2 T. vinegar
1 t. Garlic powder
2 T. Fresh cilantro, minced
½ t. Salt
10 Grinds of fresh ground pepper
Add all of the above ingredients in a small glass jar with a lid. Shake really well. Taste and adjust seasoning and ratios of oil and vinegar as you desire. When ready to serve salad, add the dressing and gently toss. IMG_6282


Thursday, July 25, 2013

Strawberry Maple-Walnut Salad

  No comments    
categories: , , ,
Strawberry Maple-Walnut Salad
Made this for a BBQ last weekend. So simple and fresh! I just love salads with fruit in them. Ingredients: spinach, strawberries, walnuts (or any kind of nut you’d like), maple syrup, feta cheese, poppy seed dressing & a pat of butter (not shown).Strawberry Maple-Walnut Salad
I love carmalized nuts. Maybe a little too much! When putting them in a salad I always make them first and then let them chill in the fridge before topping the salad. In a skillet warmed to medium heat, place a large pat of butter and let it melt. Throw the nuts in (un-chopped) and make sure there is enough melted butter to coat them. The butter helps the maple syrup from burning and sticking to the pan (and it tastes good too ;).
Once the butter is melted, then pour some syrup in, enough to coat. Real maple syrup tastes so good when it caramelizes down.
It should look a little bubbly like this:
Candied Pecans -How-to
Let it bubble for a couple minutes until all the nuts are well coated. Then turn the pan over onto a cutting board, spread the nuts out and chop them. I like them chopped small but you can do whatever you like best. Candied Pecans -How-to
Next grab your strawberries and wash them with cold water. I like to quarter them. Strawberry Maple-Walnut SaladStrawberry Maple-Walnut Salad     
This meal is great for family dinners too because our little kids just eat the strawberries separately. Mmmm.Strawberry Maple-Walnut Salad